

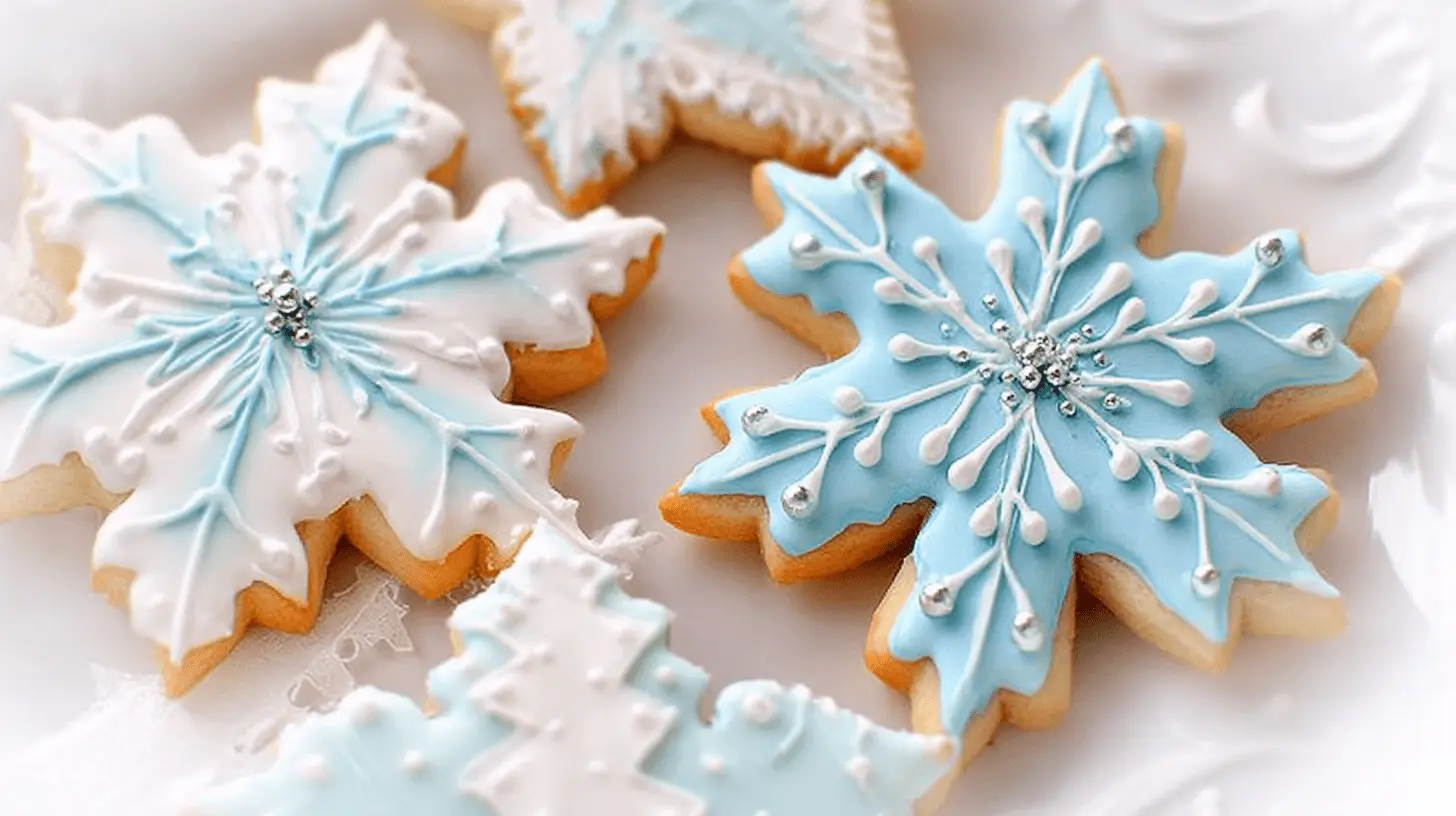
Embrace the magic of winter with these enchanting snowflake cookies! Perfect for adding a touch of festive cheer to any holiday spread, these beautiful treats are as delightful to look at as they are to eat. Whether you’re planning a cookie exchange, a cozy gathering, or looking for a heartfelt homemade gift, these delicious sugar cookies, adorned with delicate royal icing, are sure to impress. Get ready to bake and decorate your way to a stunning display of edible winter art!
Table of Contents
Why You’ll Love This Snowflake Cookie Recipe
- This recipe provides an easy-to-follow, classic cut-out cookie base that’s perfect for beginners.
- Versatile and adaptable, these charming cookies suit any winter holiday or celebration.
- Decorating is a fun activity for all ages, sparking creativity in the kitchen.
- You’ll achieve beautiful, impressive results that look professionally made.
- Every bite offers a delicious, buttery flavor, making these snowflake cookies truly irresistible.
Ingredients
Making beautiful snowflake cookies starts with quality ingredients. Here’s what you’ll need to create both the tender sugar cookies and the smooth royal icing that makes them shine.
For the Sugar Cookies
- 3 cups all-purpose flour: The base of our cookie dough.
- ¼ tsp baking soda: Helps with a slight lift and tender texture.
- ½ teaspoon salt: Balances the sweetness and enhances flavor.
- 1 cup unsalted butter, softened: Crucial for a rich, tender crumb.
- 1 cup granulated sugar: Provides sweetness and contributes to the cookie’s structure.
- 1 large egg: Binds the ingredients together and adds richness.
- 1 1/2 teaspoons vanilla extract: Offers classic, warm flavor.
For the Royal Icing
- 1 pound confectioners’ sugar (sifted): The foundation for smooth, stable icing.
- ¼ cup meringue powder: A safe and reliable alternative to fresh egg whites.
- ½ tsp cream of tartar: Stabilizes the meringue powder and improves icing texture.
- ½ cup water: Used to achieve the right icing consistency.
- 1 tsp clear vanilla extract: Provides flavor without affecting the bright white color.
- Gel food coloring (optional): For vibrant, stable colors if desired.
Notes & Substitutions
Ensure your butter is properly softened for the cookie dough; this allows it to cream smoothly with the sugar, creating a light, airy base. For truly white royal icing, use clear vanilla extract instead of regular vanilla, which can tint the icing slightly. Meringue powder is a fantastic and safe substitute for raw egg whites in royal icing, offering stability and a reliable texture. As outlined by sources like Iowa State University Extension, meringue powder significantly reduces the risk of foodborne illnesses often associated with raw egg whites in royal icing. When measuring flour, use the spoon-and-level method to avoid adding too much, which can result in dry, crumbly cookies. Gel food coloring provides much more vibrant and concentrated color compared to liquid food coloring, without adding excess moisture to your icing.
Equipment
You don’t need fancy tools to make these delightful snowflake cookies, just a few kitchen essentials.
- Stand mixer or hand mixer: For effortlessly creaming butter and sugar, and whipping royal icing.
- Large mixing bowls: To combine your cookie dough and icing ingredients.
- Rolling pin: For achieving an even thickness when rolling out the dough.
- Snowflake cookie cutters: Essential for creating those festive shapes.
- Baking sheets: To bake your beautiful cookies.
- Parchment paper: Prevents sticking and ensures easy cleanup.
- Piping bags and tips: For precise and intricate royal icing decoration.
Instructions
Creating these charming snowflake cookies involves a few straightforward steps. Follow along carefully for delicious results!
Making the Perfect Sugar Cookies
First, prepare your dry ingredients. Sift together the all-purpose flour, baking soda, and salt in a medium bowl, then set it aside. In a large mixing bowl, cream the softened unsalted butter and granulated sugar together using a stand mixer or hand mixer until the mixture is light and fluffy. Beat in the large egg and vanilla extract until well combined. Gradually add the sifted flour mixture to the wet ingredients, mixing on low speed until the dough just comes together and no dry streaks remain. Be careful not to overmix the dough.
Divide the dough into two equal portions. Place each portion between two sheets of wax paper and roll it out to about 1/4-inch thickness. This method helps prevent sticking and makes cleanup easier. Using your favorite snowflake cookie cutters, cut out various shapes. Carefully transfer the cut-out cookies to baking sheets lined with parchment paper. Place the baking sheets in the freezer for about 10 minutes; this brief chilling step helps the cookies maintain their shape while baking. Preheat your oven to 350°F (175°C). Bake the cookies for 8-12 minutes, or until the edges are lightly golden. Baking time will vary based on cookie size and thickness. Allow the baked cookies to cool completely on the baking sheets for a few minutes before transferring them to wire racks to finish cooling.
Preparing the Royal Icing
While your cookies cool, prepare the royal icing. In a large mixing bowl, combine the sifted confectioners’ sugar, meringue powder, and cream of tartar. Add the water and clear vanilla extract. Using the paddle attachment on your stand mixer, beat the mixture on high speed until stiff peaks form. The icing should be smooth but firm enough to hold its shape. If the icing is too thick, add water a teaspoon at a time, mixing after each addition, until you reach your desired piping consistency. If you plan to use multiple colors, divide the white icing into separate bowls now. Add a few drops of gel food coloring to each portion and mix until you achieve the desired hue. Remember that the color will deepen slightly as the icing dries.
Decorating Your Snowflake Cookies
Now for the fun part: decorating your snowflake cookies! Fill your piping bags with the royal icing. For the base layer, use a thinner consistency of icing (flood icing) to fill the entire cookie. First, outline the cookies with a slightly thicker icing consistency. Then, immediately flood the interior of the outline with the thinner icing, using a scribe tool or toothpick to gently spread it to the edges and pop any air bubbles. Let this base layer dry for at least 2-3 hours, or until it is completely hardened to the touch. Once the base is dry, use a thicker icing consistency to pipe intricate snowflake designs, dots, or other patterns on top. Allow your completed cookies to dry completely for at least 12 hours, or ideally overnight, before storing them. This ensures the icing fully hardens and prevents smudging.
Pro Tips for Perfect Snowflake Cookies
Achieving stunning snowflake cookies is easier with a few expert tricks. Always chill your cookie dough before baking; this prevents spreading and ensures your cookie edges remain wonderfully sharp. Ensure your cookies are completely cool before applying any icing, as warmth can cause the icing to melt or smudge. Sift your confectioners’ sugar for the royal icing to prevent lumps and achieve a beautifully smooth finish. Pay close attention to controlling the icing consistency – it’s key for both outlining and flooding. Finally, keep in mind that royal icing colors tend to darken slightly as they dry, so start with a shade slightly lighter than your desired final look.
Common Mistakes to Avoid
Avoid overworking your cookie dough, as this can lead to tough, dense cookies. Skipping the dough chilling step is a common error that results in cookies losing their defined shapes. Not sifting confectioners’ sugar will give you lumpy, unattractive royal icing. Be cautious not to add too much water to your royal icing; it’s easier to add more water than to fix overly thin icing. Lastly, never decorate warm cookies, as the heat will melt your carefully prepared royal icing.
Serving, Storage, and Variations
These snowflake cookies are a delightful treat for any occasion.
Serving Suggestions
- Serve them proudly at holiday parties or festive family gatherings.
- Include your beautifully decorated snowflake cookies in a thoughtful cookie exchange.
- Package them in decorative boxes or bags for homemade gifts that everyone will cherish.
- Enjoy these buttery cookies with a warm mug of hot cocoa, coffee, or tea.
Storage Tips
- Store decorated snowflake cookies in an airtight container at room temperature.
- Make sure the royal icing is fully hardened before stacking or storing to prevent sticking and smudging.
- You can freeze undecorated cookie dough for up to 3 months, or freeze baked, undecorated cookies for up to 2 months. You can even freeze fully decorated cookies carefully layered with parchment paper.
- Thaw frozen cookies at room temperature for several hours before serving.
Flavor & Decoration Variations
- Add the zest of an orange or lemon to your cookie dough for a bright, citrusy twist.
- Experiment with different extracts like almond, peppermint, or maple for unique cookie flavors.
- Sprinkle unbaked cookies with colored sanding sugar for a quick, sparkly finish without icing.
- Enhance your decorated cookies with edible glitter, pearls, or sprinkles for extra sparkle.
- Try different color palettes for your icing – think icy blues, purples, or traditional reds and greens.
Nutrition Information
Making homemade treats allows you to know exactly what goes into each bite. Here’s the estimated nutrition information per serving for these delightful snowflake cookies.
| Nutrient | Amount |
|---|---|
| Calories | 195 kcal |
| Calories from Fat | 54 |
| Fat | 6g |
| Saturated Fat | 4g |
| Cholesterol | 22mg |
| Sodium | 77mg |
| Potassium | 48mg |
| Carbohydrates | 32g |
| Fiber | 1g |
| Sugar | 22g |
| Protein | 3g |
| Vitamin A | 197IU |
| Calcium | 6mg |
| Iron | 1mg |
Nutrition values are approximate and may vary based on ingredients and portion sizes.
Frequently Asked Questions (FAQ)
Can I make the cookie dough ahead of time?
Yes, you can prepare the cookie dough up to 3 days in advance. Simply wrap it tightly in plastic wrap and refrigerate until ready to roll and cut your snowflake cookies.
Why do my cookies spread when baking?
Cookies often spread due to insufficient chilling of the dough or if your butter was too warm. Always chill your cut-out cookies for at least 10 minutes before baking to help them hold their shape.
How do I get smooth royal icing?
Always sift your confectioners’ sugar to eliminate lumps, and ensure you beat the icing sufficiently. Properly adjusting the consistency with small additions of water is also key for achieving a super smooth finish on your snowflake cookies.
What is the difference between flood and piping icing?
Flood icing is thinner, used to fill large areas of the cookie, while piping icing is thicker, perfect for outlines and intricate decorative details. You adjust consistency by adding tiny amounts of water.
How long does royal icing take to dry?
Royal icing takes several hours to dry completely, depending on humidity and thickness. For best results and to prevent smudging, let your decorated snowflake cookies dry overnight, or at least 12 hours.
Conclusion
Baking and decorating snowflake cookies offers a wonderful way to embrace the festive season, creating edible works of art that bring joy to everyone. With our easy-to-follow steps and helpful tips, even beginners can achieve beautifully decorated treats. Gather your ingredients, roll out that dough, and let your creativity shine as you craft these charming cookies. The delightful taste and impressive appearance of your homemade snowflake cookies will surely be the sweet reward for your efforts, making your holidays even more special. Happy baking!
Festive & Flavorful Snowflake Cookies
Equipment
- Sifter
- Large mixing bowls
- Electric mixer (with paddle attachment)
- Wax paper
- Cookie cutters
- Baking trays
- Parchment paper
- Piping Bags
- Round metal tips
Ingredients
Sugar Cookies
- 3 cups all purpose flour
- ¼ tsp baking soda
- ½ teaspoon salt
- 1 cup unsalted butter softened
- 1 cup sugar
- 1 large egg
- 1 1/2 teaspoons vanilla
Royal Icing
- 1 pound confectioners sugar
- ¼ cup meringue powder
- ½ tsp cream of tartar
- ½ cup water
- 1 tsp clear vanilla
- Gel food coloring
Instructions
Sugar Cookies
- Sift together flour, baking soda, and salt; then set aside.
- Cream butter and sugar, then beat in the egg until combined.
- Gradually add the sifted flour mixture in two batches, blending until the dough just comes together.
- Mix in the vanilla extract.
- Roll out the dough between wax paper sheets and cut into desired shapes using cookie cutters.
- Transfer cut shapes to parchment-lined baking trays and freeze for 10 minutes before baking.
- Bake at 350°F (175°C) for 8-12 minutes, or until edges are lightly golden, adjusting time based on cookie size.
Royal Icing
- In a large bowl, combine confectioners sugar, meringue powder, cream of tartar, water, and clear vanilla. Beat on high speed with a paddle attachment until stiff peaks form, adding more water by the teaspoon if a thinner piping consistency is desired.
- Incorporate gel food coloring to achieve your desired shade, noting that the color will intensify as the icing dries.
Decorate the Cookies
- Divide the royal icing into two consistencies (thinner for flooding, thicker for detailing), fill piping bags with round metal tips, and ice the cookies.
- Allow the base icing to dry for a few hours before piping designs.
- Let the decorated cookies dry completely for at least 12 hours before storing them in airtight containers.
- Store cookies at room temperature in airtight containers; they will remain fresh for several days.


