

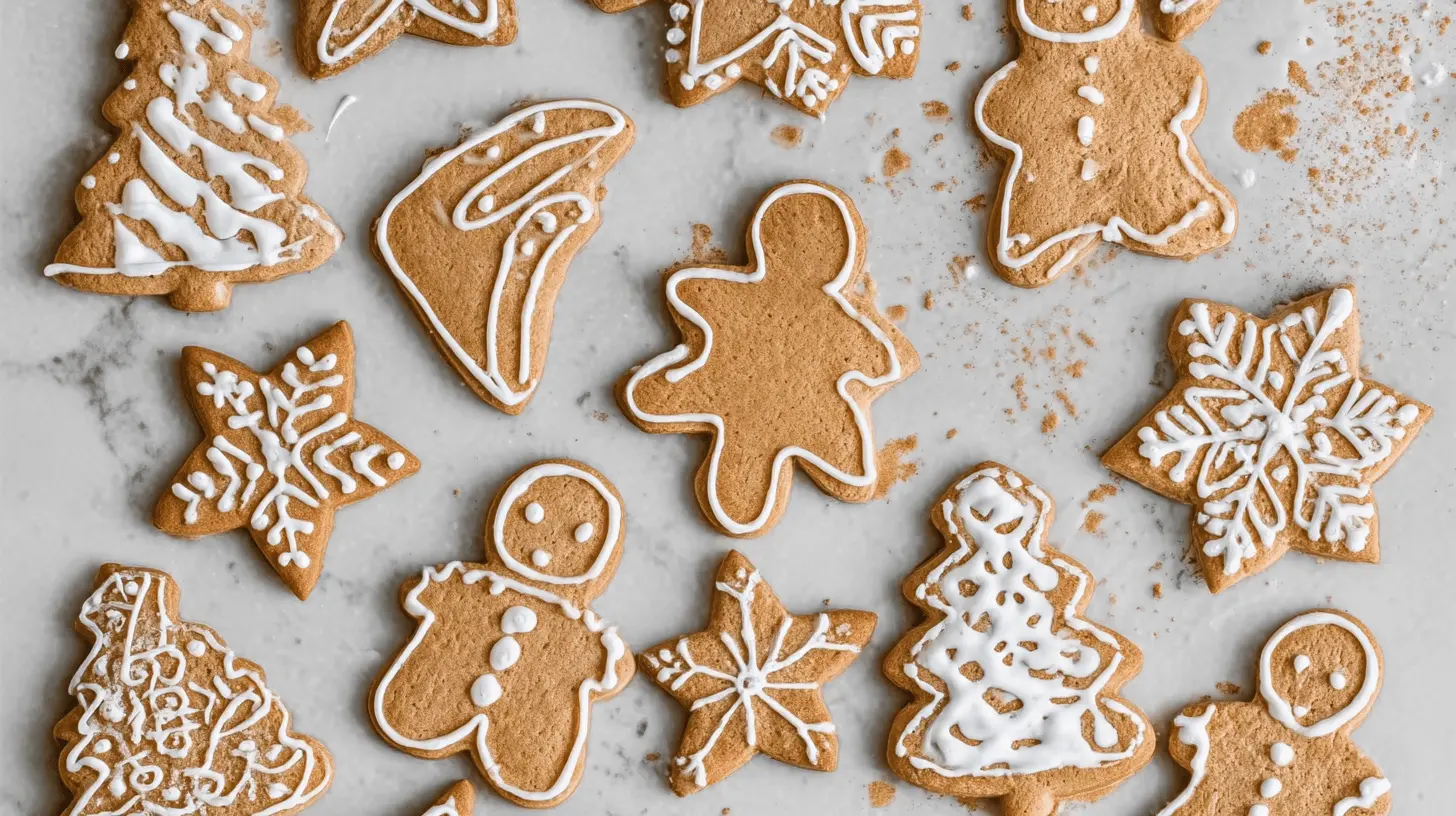
These classic royal icing Christmas cookies bring festive cheer to any holiday table. They are a delightful way to celebrate the season with edible art. This guide simplifies the process, allowing you to create beautiful, elegant designs with ease. Get ready to transform simple cookies into stunning, memorable treats. You will learn everything from baking the perfect cookie to mastering royal icing consistency.
Table of Contents
Why You’ll Love These Royal Icing Christmas Cookies
You’ll love creating beautiful royal icing Christmas cookies because they are truly special.
- They are perfect for holiday baking, filling your home with wonderful aromas.
- You can customize flavors and designs, making each batch uniquely yours.
- These cookies are impressive, delicious, and make fantastic, heartfelt gifts.
- Decorating is a fun activity for all skill levels, a wonderful way to gather family.
- They offer a traditional taste paired with beautiful, picture-perfect presentation.
Ingredients
To create stunning royal icing Christmas cookies, you need quality ingredients for both the cookie base and the vibrant decorations. Always measure precisely for the best results.
Cookie Dough
- 110 g unsalted butter soft, at room temperature
- 150 g granulated sugar
- 1 egg
- 1 tsp vanilla extract
- 1 tsp ginger powder
- 0.5 tsp ground cinnamon
- 0.125 tsp ground cloves
- 1 tsp salt
- 1.5 tsp baking powder
- 250 g all-purpose flour + more to dust the surface for rolling
Royal Icing (Egg White Method)
- 1 egg white or 30g pasteurized egg whites
- 400 g icing sugar + more to adjust the consistency
- Water
Royal Icing (Meringue Powder Method)
- 150 g icing sugar
- 1 tbsp meringue powder
- Water
- liquid or gel food colouring
Notes & Substitutions
Ensure butter is soft and at room temperature; this creams best with sugar for a smooth cookie dough. Feel free to adjust or omit spices like ginger, cinnamon, and cloves based on your preference. For food safety, especially when serving vulnerable populations, it is recommended to use pasteurized egg whites for royal icing. A little lemon juice can be added to the royal icing for a subtle citrus flavor and extra shine.
How to Make Royal Icing Christmas Cookies: Step-by-Step Instructions
Making royal icing Christmas cookies involves a few distinct stages, from baking the perfect base to carefully decorating each festive treat. Follow these steps for delicious and beautiful results.
Cookie Preparation
- Cream soft butter, granulated sugar, and salt together until the mixture is light and fluffy.
- Incorporate the egg into the creamed mixture until it is fully blended.
- Add the vanilla extract and all the ground spices, then mix until combined.
- Gradually add the flour and baking powder, mixing with a spatula, then gently knead with hands until a dough forms.
- Cover the cookie dough and refrigerate for at least 30 minutes to firm up.
- On a floured surface, roll the chilled dough to 2-3mm thickness and cut out shapes using cookie cutters.
- Carefully transfer the cut cookies from the surface to a non-stick or parchment-lined baking tray using a thin metal spatula.
- Bake the cookies in a preheated oven at 180°C/350°F for 8-12 minutes, or until lightly golden.
- Allow the baked cookies to cool completely on the tray before attempting any decoration to prevent the icing from melting.
Royal Icing Preparation
- Sieve egg whites and 400g icing sugar into a bowl, then beat until combined and the texture is suitable for piping without spreading. Adjust consistency with water or lemon juice if too hard, or more sieved icing sugar if too soft.
- Sieve 150g icing sugar and meringue powder into a bowl, then gradually add water and mix until a paste forms with the desired consistency for decorating. Adjust consistency as needed by adding more water or sieved icing sugar.
- If not using the icing immediately, cover its surface with two layers of damp kitchen paper to prevent drying.
- Before use, re-assess the icing’s thickness and adjust, remembering that food coloring will thin it out.
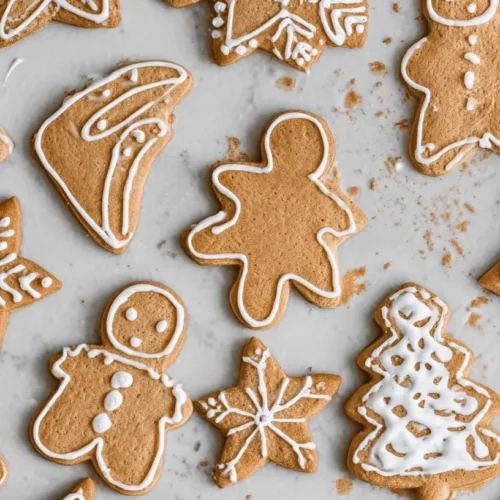
Decorating the Cookies
- Transfer the royal icing to a piping bag fitted with a small nozzle for precise decoration.
- To decorate, hold the nozzle about 3mm above the cookie and slowly squeeze the piping bag, allowing the string of icing to drop onto the cookie. Use a toothpick to smooth lines if necessary.
- For multi-layered designs, allow initial icing layers to dry for 5-10 minutes to prevent them from merging before adding more details. For a solid background, outline, fill, and then let dry before adding further decorations.
Pro Tips for Perfect Royal Icing Christmas Cookies
Mastering these techniques will elevate your decorated holiday treats. Practice makes perfect with royal icing!
Achieving the Right Icing Consistency
Royal icing consistency is paramount. Stiff consistency (like toothpaste) holds sharp peaks, ideal for intricate details or royal icing flowers. Medium consistency (like soft-serve ice cream) is perfect for outlining and basic piping. Flood consistency (like honey) is used to fill in areas smoothly. To adjust, add a tiny amount of water (use a spray bottle for control) to thin, or sieve in more icing sugar to thicken. Mix thoroughly after each addition. The proper flow and spread of royal icing is crucial, with various consistencies like stiff, medium, and flood each serving a specific decorating purpose.
Troubleshooting Common Royal Icing Issues
Dealing with craters? This often happens when flood icing is too thin or doesn’t fully settle. Gently tap the cookie to help the icing spread, or use a scribe to pop air bubbles. Prevent color bleed by allowing each color or layer to dry completely before adding another, especially if colors are contrasting. Fix air bubbles by gently tapping the cookie on your work surface or using a scribe tool to pop them before the icing sets. Icing cracking might occur if the icing dries too quickly or is too thin. Ensure a consistent temperature and humidity, and avoid overly thin flood icing.
Serving, Storage, and Variations
These royal icing Christmas cookies are versatile for holiday enjoyment and gifting.
Serving Suggestions
Arrange your beautifully decorated Christmas cookie designs on a festive platter for a stunning holiday display. They pair wonderfully with hot chocolate, coffee, or mulled cider during winter gatherings. Package them in clear cellophane bags with ribbons for thoughtful, homemade gifts. Consider placing one as a charming place setting decoration for your holiday dinner.
Storage Instructions
Store fully decorated royal icing Christmas cookies in an airtight container at room temperature for up to two weeks. Keep them away from direct sunlight or humidity to prevent color fading or stickiness. You can also freeze undecorated baked cookies for up to three months; thaw them at room temperature before decorating. Freezing decorated cookies is possible, but carefully layer them with parchment paper to prevent damage to the icing.
Creative Variations
Experiment with different cookie dough flavors, like chocolate, gingerbread, or orange zest. Use seasonal food coloring beyond traditional reds and greens; think pastels or metallics. Add textural elements like sanding sugar, edible glitter, or small nonpareils while the icing is still wet. For advanced decorators, try wet-on-wet techniques, stenciling, or creating dimension with multiple icing layers on your holiday cookies with royal icing.
Nutrition Information
Please note that this nutrition information is an estimate. Homemade recipes can vary significantly based on ingredients used and portion sizes. For precise values, we recommend using an online nutrition calculator with your specific ingredients.
| Amount Per Serving | % Daily Value* |
|---|---|
| Calories | 150-200 |
| Total Fat | 6g |
| Saturated Fat | 3g |
| Cholesterol | 15mg |
| Sodium | 100mg |
| Total Carb | 25g |
| Dietary Fiber | 0g |
| Total Sugars | 18g |
| Protein | 2g |
*Percent Daily Values are based on a 2,000 calorie diet.
FAQ about Royal Icing Christmas Cookies
Can I make royal icing ahead of time?
Yes, you can prepare royal icing up to two weeks in advance. Store it in an airtight container in the fridge with plastic wrap pressed directly onto the surface to prevent a crust from forming.
How long does royal icing take to dry?
Thin flood icing can dry to the touch in 2-4 hours, but it needs 12-24 hours to fully harden, especially for packaging or layering. Stiffer icing for details dries faster.
What kind of food coloring is best?
Gel food colorings are highly recommended as they are concentrated and won’t significantly thin your icing, unlike liquid food colors. This helps maintain proper consistency.
Conclusion
Decorating royal icing Christmas cookies is a truly rewarding holiday tradition that brings joy to both the baker and the recipient. From the comforting aroma of freshly baked gingerbread to the intricate details of shimmering icing, each step is a celebration. Embrace your creativity and enjoy the process of transforming simple cookies into stunning edible art. We can’t wait to see your festive creations! Share your beautiful designs with us.
Easy Royal Icing Christmas Cookies: Your Guide to Festive Decorations
Equipment
- whisk
- Mixing bowls
- Spatula
- Plastic wrap
- Rolling Pin
- Cookie cutters
- Thin Metal Spatula
- Non-Stick Baking Tray
- Oven
- Sieve or Colander
- Piping bag
- Small Nozzle
- Toothpick
Ingredients
Cookie Dough
- 110 g unsalted butter soft, at room temperature
- 150 g granulated sugar
- 1 egg
- 1 tsp vanilla extract
- 1 tsp ginger powder
- 0.5 tsp ground cinnamon
- 0.125 tsp ground cloves
- 1 tsp salt
- 1.5 tsp baking powder
- 250 g all-purpose flour + more to dust the surface for rolling
Royal Icing (Egg White Method)
- 1 egg white or 30g pasteurized egg whites
- 400 g icing sugar + more to adjust the consistency
- Water
Royal Icing (Meringue Powder Method)
- 150 g icing sugar
- 1 tbsp meringue powder
- Water
- liquid or gel food colouring
Instructions
Cookie Preparation
- Cream soft butter, granulated sugar, and salt together until the mixture is light and fluffy.
- Incorporate the egg into the creamed mixture until it is fully blended.
- Add the vanilla extract and all the ground spices, then mix until combined.
- Gradually add the flour and baking powder, mixing with a spatula, then gently knead with hands until a dough forms.
- Cover the cookie dough and refrigerate for at least 30 minutes to firm up.
- On a floured surface, roll the chilled dough to 2-3mm thickness and cut out shapes using cookie cutters.
- Carefully transfer the cut cookies from the surface to a non-stick or parchment-lined baking tray using a thin metal spatula.
- Bake the cookies in a preheated oven at 180°C/350°F for 8-12 minutes, or until lightly golden.
- Allow the baked cookies to cool completely on the tray before attempting any decoration to prevent the icing from melting.
Royal Icing Preparation
- Sieve egg whites and 400g icing sugar into a bowl, then beat until combined and the texture is suitable for piping without spreading. Adjust consistency with water or lemon juice if too hard, or more sieved icing sugar if too soft.
- Sieve 150g icing sugar and meringue powder into a bowl, then gradually add water and mix until a paste forms with the desired consistency for decorating. Adjust consistency as needed by adding more water or sieved icing sugar.
- If not using the icing immediately, cover its surface with two layers of damp kitchen paper to prevent drying.
- Before use, re-assess the icing’s thickness and adjust, remembering that food coloring will thin it out.
Decorating the Cookies
- Transfer the royal icing to a piping bag fitted with a small nozzle for precise decoration.
- To decorate, hold the nozzle about 3mm above the cookie and slowly squeeze the piping bag, allowing the string of icing to drop onto the cookie. Use a toothpick to smooth lines if necessary.
- For multi-layered designs, allow initial icing layers to dry for 5-10 minutes to prevent them from merging before adding more details. For a solid background, outline, fill, and then let dry before adding further decorations.


