

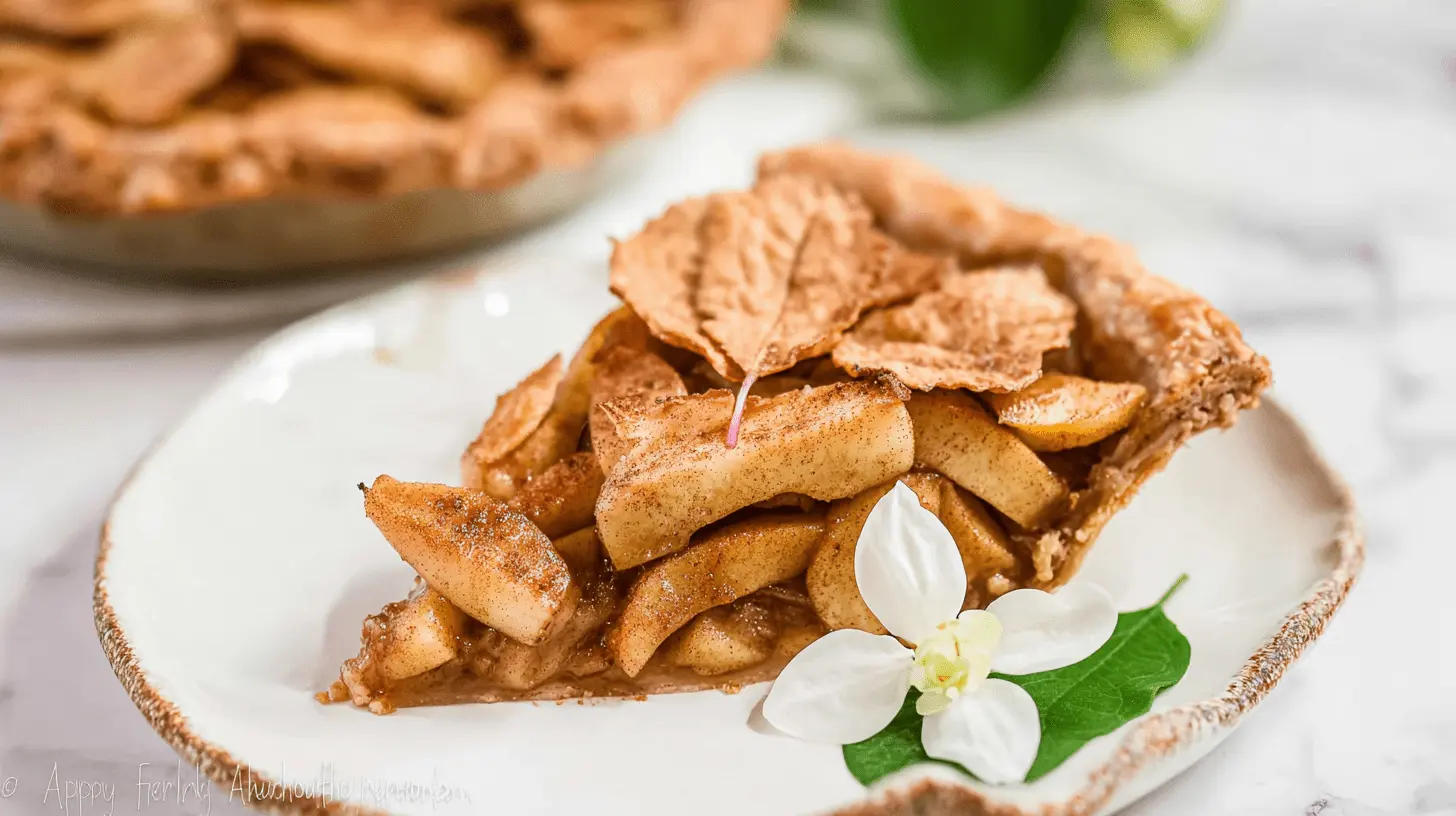
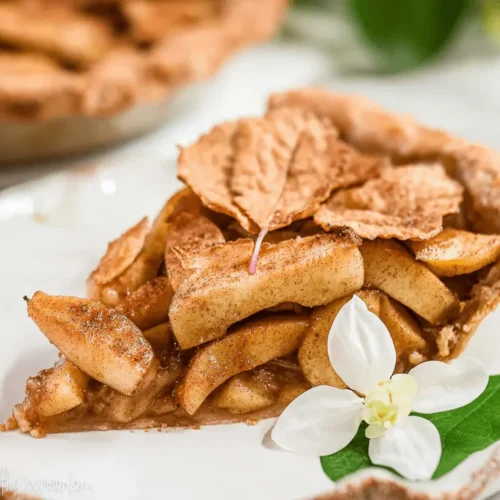
Craving a classic dessert without all the guilt? This healthy apple pie recipe delivers on taste and tradition, all while keeping things light and wholesome. We’ll guide you through creating a flaky, tender crust and a perfectly spiced apple filling, all from scratch. Get ready to enjoy the cozy flavors of autumn with this ultimate healthy apple pie!
Table of Contents
Why You’ll Love This Healthy Apple Pie
- Flaky, Tender, All-Butter Whole Wheat Crust: Enjoy a satisfying crunch with every bite, made with better-for-you ingredients.
- Perfectly Sweet and Spiced Apple Filling: Our blend of apples and warm spices creates a delicious, comforting experience.
- Blend of Apples for Balanced Flavor: We use a combination of Fuji, Gala, and Granny Smith for a complex, harmonious taste.
- Lower in Calories and Refined Sugar: Indulge without overdoing it, thanks to smart ingredient choices. This makes for a truly healthy apple pie.
- Impressive Homemade Dessert for Any Occasion: Wow your family and friends with a pie that tastes incredible and offers a healthier twist.
Ingredients
Crafting a delightful healthy apple pie starts with quality ingredients. Here’s what you need for both our lightened-up crust and flavorful filling. Measuring accurately is key to success!
For the Crust:
- 1 cup (120g) white whole wheat flour
- ½ tsp salt
- 4 tbsp (56g) unsalted butter, very cold and cubed
- 2 tsp nonfat milk, cold
- 1 tsp pure maple syrup, cold
- ¾ tsp vanilla extract
- 1-2 tbsp (15-30mL) ice cold water, as needed
For the Filling:
- Generous 2 ½ cups (305g) ⅛”-thick slices Fuji apple, cut in half
- Generous 2 ½ cups (305g) ⅛”-thick slices Gala apple, cut in half
- Heaping 1 ½ cups (175g) ⅛”-thick slices Granny Smith apple, cut in half
- 3 tbsp (24g) cornstarch
- 2 tsp ground cinnamon
- ¼ tsp ground allspice
- ¼ tsp ground nutmeg
- 3 tbsp (45mL) water
- 1 tbsp (15mL) pure maple syrup
Notes & Substitutions
White whole wheat flour provides a whole-grain boost without the heavy texture of traditional whole wheat. You can substitute with all-purpose flour if preferred, but note it won’t be as healthy. Research suggests that consuming whole grains offers numerous health benefits, including reduced risk of chronic diseases. Keep your butter extremely cold for the flakiest crust; this is non-negotiable! The science behind using cold butter in pie crust relies on the creation of steam pockets, which lead to flaky layers. For the wet ingredients, feel free to use any cold milk, and honey can replace maple syrup if that’s what you have. Adjust cinnamon to your taste. For apples, peeling is optional for extra fiber, but it prevents the skin from getting tough during baking.
Equipment
Gathering your tools before you start makes the baking process smoother and more enjoyable. You won’t need anything fancy for this healthy apple pie.
- Medium mixing bowls (2)
- Pastry cutter (or two knives, or a fork)
- Rolling pin
- 9-inch standard pie plate (not deep dish)
- Dark metal baking sheet
- Plastic wrap
- Aluminum foil
Instructions
Let’s bake the ultimate healthy apple pie! Follow these easy, step-by-step instructions to create a delicious and wholesome dessert that tastes like a classic. Take your time, especially with the crust, for the best results.
Prepare the Crust
To begin, whisk together the flour and salt in a medium bowl. Cut in the cold butter using a pastry cutter, the back of a fork, or two knives until the mixture resembles coarse crumbs. In a separate bowl, stir together the milk, maple syrup, vanilla extract, and 1 teaspoon of ice water. Sprinkle the liquid mixture over the flour mixture, and stir until fully incorporated. Continue to add ice water, ¼ teaspoon at a time, until the mixture comes together to form a dough.
Place a large sheet of plastic wrap on the counter. Using your hands, form the dough into a 1”-thick circle. Place the dough in the center of the plastic wrap, and lay another large sheet of plastic wrap on top. Fold up the excess plastic wrap, and refrigerate the dough for at least 30 minutes. If chilled longer than 1 hour, let the dough “thaw” on the counter for 5-15 minutes or more, depending on how much longer it was chilled, before rolling it out.
Make the Filling
While the dough chills, prepare the filling. I typically wait to slice the apples until now to save time. Toss together the apple slices, cornstarch, cinnamon, allspice, and nutmeg until the spices are evenly distributed on the apples. Drizzle in the maple syrup and water, and toss the apples again until they’re evenly coated. This ensures a beautifully flavored apple pie.
Assemble the Pie
Preheat the oven to 425°F, and place a dark metal baking sheet into the oven on the middle rack. Lightly coat a regular 9” pie plate (not deep dish!) with cooking spray. Leaving the dough between the sheets of plastic wrap, roll it out until it’s 1” to 2” wider than the top of the pie plate. Peel off the top layer of plastic wrap, and gently invert the pie dough into the prepared pie plate. Peel off the second layer of plastic wrap, and gently press the pie dough into place. Trim the overhang.
Transfer the filling on top of the pie dough, and gently but firmly press down to eliminate as much space between the apples as possible. I use my hands to do this. Cover the top of the entire pie plate with foil, trying to “bump up” the center so it’s not touching the apple slices.
Bake the Pie
Place the foil-covered pie plate on the dark metal baking sheet in the oven. Bake the pie at 425°F for 15 minutes. Without opening the oven door, reduce the temperature to 350°F, and continue to bake for an additional 40 minutes. Carefully remove the foil from the top of the pie plate, and continue to bake at 350° for another 15 minutes (for a total of 70 minutes) or until the outer crust is golden in color. Let the pie cool completely to room temperature before slicing and serving. This resting time is crucial for the filling to set, giving you a perfect slice of this healthy apple pie.
Pro Tips for the Best Healthy Apple Pie
Achieving a perfect healthy apple pie is easier with a few expert tips. Follow these for a consistently delicious outcome.
- Measure flour accurately: Use a kitchen scale for best results, or spoon flour into a measuring cup and level it off.
- Keep butter very cold: This creates steam during baking, leading to an incredibly flaky crust.
- Slice apples thinly and uniformly: Even slices ensure even cooking and a tender filling.
- Use a mix of apple varieties: The combination provides a balanced sweet-tart flavor and varied texture.
- Press down apples firmly in pie plate: This eliminates air pockets and prevents the pie from sinking.
- Always cover with foil during initial baking: This protects the crust from browning too quickly.
- Allow pie to cool completely: This is essential for the filling to set properly, preventing a runny pie.
Serving, Storage, & Variations
Serving your healthy apple pie warm is always a treat, but don’t forget about storing it for later enjoyment.
Serving Suggestions
Serve this delicious healthy apple pie slightly warm, perhaps with a scoop of light vanilla ice cream or a dollop of Greek yogurt for an extra touch. The warm spices pair beautifully with cold, creamy additions.
Storage
Store leftover pie at room temperature, loosely covered, for up to 24 hours. For longer storage, refrigerate the pie, covered, for up to 3-4 days. You can gently warm slices in the oven before serving again.
Variations
- Decorative Crust: Get creative with a lattice top or use small cookie cutters for decorative shapes on the top crust.
- Spice It Up: Experiment with other warm spices like a pinch of cardamom, ground ginger, or even a touch of star anise for a unique flavor.
- Apple Blends: Feel free to try different apple combinations based on your preferences or what’s in season.
- Upcoming Options: We’re working on gluten-free and vegan versions of this recipe, so stay tuned!
Nutrition Information
This healthy apple pie is designed to be a lighter alternative to traditional recipes. It features whole grains and reduced sugar, making it a more wholesome choice. While exact nutritional values can vary slightly based on specific ingredients and measurements, this breakdown gives you a good idea. For a comprehensive overview, please refer to the detailed nutrition information provided in the recipe card below.
| Nutrient | Amount Per Serving (Estimate) |
|---|---|
| Calories | 250-280 |
| Total Fat | 10-12g |
| Saturated Fat | 6-7g |
| Cholesterol | 25-30mg |
| Sodium | 100-120mg |
| Total Carbs | 35-40g |
| Dietary Fiber | 4-5g |
| Total Sugars | 18-22g |
| Protein | 3-4g |
Healthy Apple Pie FAQ
Got questions about making your perfect healthy apple pie? We’ve got answers!
Which apples are best for apple pie?
A mix of sweet and tart apples, like Fuji, Gala, and Granny Smith, provides the best flavor and texture contrast. This ensures a balanced and delicious filling for your healthy apple pie.
Can I use a different flour for the crust?
Yes, you can use all-purpose flour, but it will reduce the whole-grain benefit. White whole wheat flour offers a lighter texture than traditional whole wheat.
How can I prevent a soggy bottom crust?
Baking your pie on a preheated dark metal baking sheet helps conduct heat directly to the bottom crust. This technique is key for a crisp crust with your healthy apple pie.
Why is cooling the pie completely important?
Cooling allows the hot apple filling to set and thicken properly, which prevents a runny slice. Patience pays off for a perfectly firm healthy apple pie.
Can I make this recipe vegan/gluten-free?
This specific recipe is not vegan or gluten-free, but we are developing variations! Check back soon for plant-based and gluten-friendly options.
What if my crust is too thin?
If your dough is rolled too thin, it might tear easily or become too crisp. Try to roll it to about ⅛ to ¼ inch thickness for the ideal balance of flaky and tender.
Conclusion
Creating a delicious and wholesome dessert doesn’t have to be complicated. This ultimate healthy apple pie recipe proves that you can enjoy classic comfort food with a lighter touch. With its flaky whole wheat crust and perfectly spiced, naturally sweetened apple filling, it’s a treat everyone will love. So go ahead, bake a pie that’s as good for your soul as it is for your body. Share your baking success with us on social media; we can’t wait to see your creations!
The Ultimate Healthy Apple Pie: A Wholesome & Delicious Recipe
Equipment
- Medium bowl
- pastry cutter
- Plastic wrap
- Rolling Pin
- dark metal baking sheet
- 9-inch pie plate
- Cooking spray
Ingredients
Crust
- 1 cup white whole wheat flour
- ½ tsp salt
- 4 tbsp unsalted butter
- 2 tsp nonfat milk
- 1 tsp pure maple syrup
- ¾ tsp vanilla extract
- 1-2 tbsp ice cold water
Filling
- generous 2 ½ cups Fuji apple ⅛”-thick slices, cut in half
- generous 2 ½ cups Gala apple ⅛”-thick slices, cut in half
- heaping 1 ½ cups Granny Smith apple ⅛”-thick slices, cut in half
- 3 tbsp cornstarch
- 2 tsp ground cinnamon
- ¼ tsp ground allspice
- ¼ tsp ground nutmeg
- 3 tbsp water
- 1 tbsp pure maple syrup
Instructions
Instructions
- To prepare the crust, whisk together the flour and salt in a medium bowl, then cut in the butter until crumbly. In a separate bowl, stir together the milk, maple syrup, vanilla extract, and 1 teaspoon of ice water; sprinkle this liquid over the flour mixture and stir, adding more ice water ¼ teaspoon at a time until a dough forms.
- Form the dough into a 1-inch thick circle between two large sheets of plastic wrap. Refrigerate the dough for at least 30 minutes, or longer if needed, letting it thaw slightly if chilled for over an hour.
- While the dough chills, prepare the filling by tossing sliced apples with cornstarch, cinnamon, allspice, and nutmeg until evenly distributed. Drizzle in maple syrup and water, tossing again to coat the apples thoroughly.
- Preheat the oven to 425°F with a dark metal baking sheet on the middle rack. Lightly coat a regular 9-inch pie plate with cooking spray.
- Roll out the chilled dough between the plastic wrap until it is 1 to 2 inches wider than the pie plate. Carefully invert the dough into the prepared pie plate, remove the plastic, gently press the dough into place, and trim any overhang.
- Transfer the apple filling on top of the pie dough, pressing down firmly to minimize gaps between the apple slices. Cover the entire pie plate with foil, ensuring the center of the foil is not touching the apples.
- Place the foil-covered pie on the baking sheet in the oven and bake at 425°F for 15 minutes. Without opening the oven door, reduce the temperature to 350°F and bake for an additional 40 minutes; then, carefully remove the foil and continue baking at 350°F for another 15 minutes, or until the crust is golden. Allow the pie to cool completely to room temperature before slicing and serving.


