


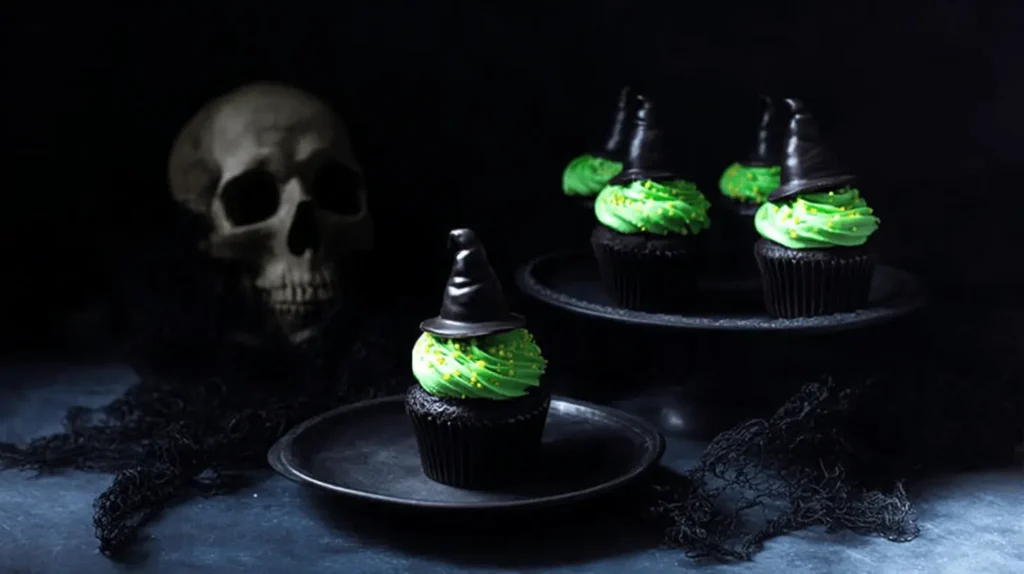
Get ready to brew up some Halloween baking magic! These witch cupcakes are incredibly fun and surprisingly simple to make, perfect for adding a spooky touch to any celebration. We skip the fussy fondant and focus on vibrant frosting designs, making this a quick and enjoyable project. Even if you are a beginner, you can create these enchanting treats with ease.
Table of Contents
Why You’ll Love These Witch Cupcakes
You’ll adore these spooky treats for so many reasons! They simplify Halloween baking without sacrificing any of the fun.
- No-Fuss Frosting Design: We use only buttercream to create impressive witch hats, avoiding complicated fondant work.
- Quick Assembly Time: You can decorate a whole batch of these witch hat cupcakes in under 30 minutes, freeing up your busy schedule.
- Kid-Friendly Decoration Activity: Let the little ones help with the green frosting base or sprinkle application for a fun family project.
- Perfect for Halloween Parties: These eye-catching witch cupcakes are sure to be a hit at any spooky gathering.
- Easily Customizable Ingredients: Adjust cupcake flavors or frosting colors to match your party theme perfectly.
Ingredients
To create your magical witch cupcakes, gather these simple items. You have options for store-bought convenience or homemade goodness.
- 12 prepared cupcakes (your favorite flavor)
- 2 ½ cups vanilla frosting (store-bought or homemade)
- 1 ¾ cups chocolate frosting (store-bought or homemade)
- Wilton Color Right food coloring: yellow, blue, and black
- Sprinkles (optional, for extra sparkle)
Notes & Substitutions
You have flexibility with your ingredients to make these witch hat cupcakes your own. Choose what works best for your schedule and skill level.
For the cupcake base, feel free to use your favorite homemade recipe or save time with a box mix or even store-bought plain cupcakes. Both homemade and store-bought frostings work beautifully here; just ensure they are a good piping consistency. If your store-bought frosting is too thick, add a tiny bit of milk or cream. Wilton Color Right offers intense, true colors, but other gel food coloring brands will also achieve vibrant shades. To get the perfect lime green, remember the precise yellow and blue drop ratio detailed in the instructions. You can use any Halloween-themed sprinkles or substitute with sanding sugar, edible glitter, or even crushed cookie crumbs for a different texture.
Gel food coloring is often preferred by bakers due to its concentrated nature, which allows for vibrant hues without altering the frosting’s consistency, as detailed by Tasting Table. Find out more about the differences between liquid and gel food coloring for baking.
Equipment
You won’t need an elaborate setup to make these spellbinding witch cupcakes. A few basic tools will do the trick.
- Piping bags (disposable or reusable)
- Large round piping tip (e.g., Ateco 809 for the green base)
- Large petal piping tip (e.g., Wilton 127 for the hat brim)
- Medium round piping tip (for the hat cone)
- Mixing bowls (for tinting frosting)
- Spatulas (for mixing and filling bags)
Instructions
Let’s conjure up some fantastic witch cupcakes! Follow these easy steps to bring your spooky vision to life. This no-fuss method ensures perfectly themed treats every time.
First, set up your workspace. Have your cooled cupcakes ready on a tray or flat surface. Open all your food colorings and have your piping bags and tips within reach.
Now, let’s tint the frosting. Spoon your vanilla frosting into a mixing bowl. Add 37 drops of yellow and 4 drops of blue Wilton Color Right food coloring. Mix thoroughly with a spatula until you achieve a consistent, vibrant lime green color. Similarly, spoon your chocolate frosting into another bowl and add approximately 50 drops of black Wilton Color Right food coloring. Stir well until the frosting is a deep, intense black with no streaks. This makes the perfect black frosting for your witch hats.
Next, prepare your first piping bag. Fit a piping bag with the large round tip (like an Ateco 809). Fill this bag with your newly tinted lime green frosting. Hold the piping bag directly over the center of a cupcake. Apply steady pressure, starting from the center and spiraling outwards, then back inwards, to pipe a generous swirl of green frosting onto the top of each cupcake. This forms the base of your witch design.
If you are using sprinkles, gently roll the sides of the green-frosted cupcakes in your chosen sprinkles. This adds a lovely shimmering or textured detail to the base of your witch hat cupcakes.
Now, prepare for the witch hats. Take about one-third of your black frosting and scoop it into a piping bag fitted with the large petal tip (Wilton 127). Hold the piping bag so the narrow end of the petal tip points towards the center of the cupcake. Position it just above the outer edge of the green frosting. While continuously piping with steady pressure, slowly turn the cupcake with your other hand to create a flat, circular brim for the witch’s hat. Repeat this step for all the cupcakes, ensuring each has a distinct hat brim.
For the hat’s body, scoop the remaining black frosting into a fresh piping bag fitted with a medium round tip. This will create the iconic cone shape. Start by piping a large dollop of frosting directly in the center of the hat brim you just made. As you continue to pipe, slowly and steadily pull the bag upwards, gradually releasing pressure to create a tall, tapered cone shape for the witch’s hat. This forms the pointy top of your witch cupcakes.
Repeat these steps for all your cupcakes until each one sports a perfectly spooky witch hat. Once decorated, allow the frosting to set slightly at room temperature for about 10-15 minutes before serving. This helps the hats maintain their shape and prevents smudging.
Pro Tips for Perfect Witch Cupcakes
Achieving amazing witch cupcakes is easy with a few insider tricks. These tips ensure your treats look picture-perfect.
- Frosting Consistency: Your frosting should be firm enough to hold its shape but soft enough to pipe smoothly. If it’s too soft, chill it for 10-15 minutes. If it’s too stiff, add a tiny bit of milk or cream, a quarter teaspoon at a time.
- Intense Black Color: To get a truly deep black without using a whole bottle of food coloring, start with chocolate frosting. The brown base helps achieve a darker black faster and prevents a greyish tint.
- Filling Piping Bags: Stand your piping bag in a tall glass and fold the edges over the rim. This frees up both hands to scoop frosting neatly into the bag, minimizing mess.
- Piping Techniques: For the hat brim, ensure even pressure as you turn the cupcake for a smooth circle. For the cone, start with a solid base and steadily lift and release pressure to create a graceful taper.
- Troubleshooting: If your frosting hats lean, your frosting might be too soft. If it’s crumbly, it’s too cold or stiff. Adjust accordingly for flawless witch cupcakes.
Serving Suggestions, Storage & Variations
These witch cupcakes are versatile for any Halloween event. Here’s how to make the most of them.
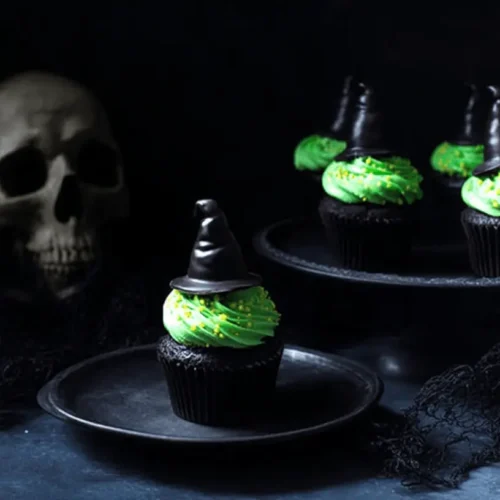
Serving: Arrange your finished witch cupcakes on a multi-tiered stand or a spooky serving platter for an impressive display at Halloween parties. They make a fantastic centerpiece. Pair them with eerie green punch, warm apple cider, or hot cocoa for a complete spooky snack spread.
Storage: Store any leftover cupcakes in an airtight container at room temperature for up to 2-3 days. If your kitchen is particularly warm, you can store them in the refrigerator, but let them come to room temperature before serving for the best taste and texture.
Shelf Life: Properly stored, these cupcakes are best enjoyed within 2-3 days of decorating. The frosting will stay fresh, and the cupcakes will remain moist.
Variations:
- Cupcake Flavors: Experiment with different cake bases! Chocolate, red velvet, or even pumpkin spice cupcakes would be delicious under the witch hats.
- Frosting Colors: Get creative with your witch themes. Use purple and orange frosting for a different Halloween vibe, or vibrant pink for a “good witch” look.
- Decorations: Add small candy corn “buckles” to the hats, edible glitter for a magical sparkle, or tiny ghost sprinkles on the green base.
- Hat Shapes: While the cone is classic, you could also pipe a slightly wider, flatter top for a different hat silhouette, or add tiny piped stars around the brim.
Nutrition Information
Please note that the following nutrition information for these witch cupcakes is an estimate. Values can vary significantly based on specific ingredients used, such as homemade versus store-bought items, and the exact serving sizes. This estimate is based on one serving.
| Nutrient | Amount |
|---|---|
| Calories | 400 calories |
| Fat Content | 25g |
| Saturated Fat Content | 15g |
| Carbohydrate Content | 45g |
| Sugar Content | 35g |
| Protein Content | 3g |
| Fiber Content | 1g |
| Cholesterol Content | 50mg |
| Sodium Content | 200mg |
FAQ
Got questions about making these fun witch cupcakes? We’ve got quick answers to help you out.
- How long do witch cupcakes last? They stay fresh in an airtight container at room temperature for 2-3 days, or up to a week in the fridge.
- Can I make these ahead of time? Absolutely! You can bake the cupcakes a day or two in advance and decorate them closer to your event.
- What if my frosting is too soft? Pop the piping bag (or bowl of frosting) into the refrigerator for 10-15 minutes to firm it up before piping.
- Can I use homemade frosting? Yes, homemade vanilla and chocolate buttercream work wonderfully. Just ensure it’s a good piping consistency.
- Are these suitable for kids to decorate? Yes, kids can easily help pipe the green base frosting and add the sprinkles, making it a fun family activity.
- How do I get intense frosting colors? Use gel food coloring, which is more concentrated than liquid. For black, starting with chocolate frosting helps achieve a deeper hue.
Conclusion
These witch cupcakes are your secret weapon for a spooktacular Halloween. They combine easy decorating with maximum visual impact, perfect for busy parents and beginners alike. We know you’ll love creating these festive treats without any stress. So, gather your ingredients, follow these simple steps, and prepare to impress everyone with your enchanting witch cupcakes. Don’t forget to share your creations online; we can’t wait to see your magical results!
Easy Witch Cupcakes for a Spooky Halloween Treat
Equipment
- Piping bag
- Ateco 809 tip
- Wilton 127 tip
- Medium round tip
Ingredients
Main Ingredients
- 12 cupcakes
- 2.5 cups vanilla frosting
- 1.75 cups chocolate frosting
- Wilton color right food coloring in yellow, blue and black
- Wilton 127 tip
- Ateco 809 tip
- Sprinkles
Instructions
Witch Hat Cupcakes
- Tint vanilla frosting lime green using approximately 37 drops of yellow and 4 drops of blue Wilton color right food coloring.
- Scoop the green frosting into a piping bag with an Ateco 809 tip and pipe a swirl onto each cupcake top.
- If desired, roll the sides of the frosted cupcakes in sprinkles.
- Tint chocolate frosting black, using about 50 drops of Wilton’s black color right system.
- Scoop one-third of the black frosting into a piping bag with a Wilton 127 tip and, with the narrow end in the center, turn the cupcake while piping to create the hat brim.
- Scoop the remaining black frosting into a bag with a medium round tip, then pipe a large dollop in the center of the cupcakes, releasing pressure as you pull up to form the tapered hat top.


