

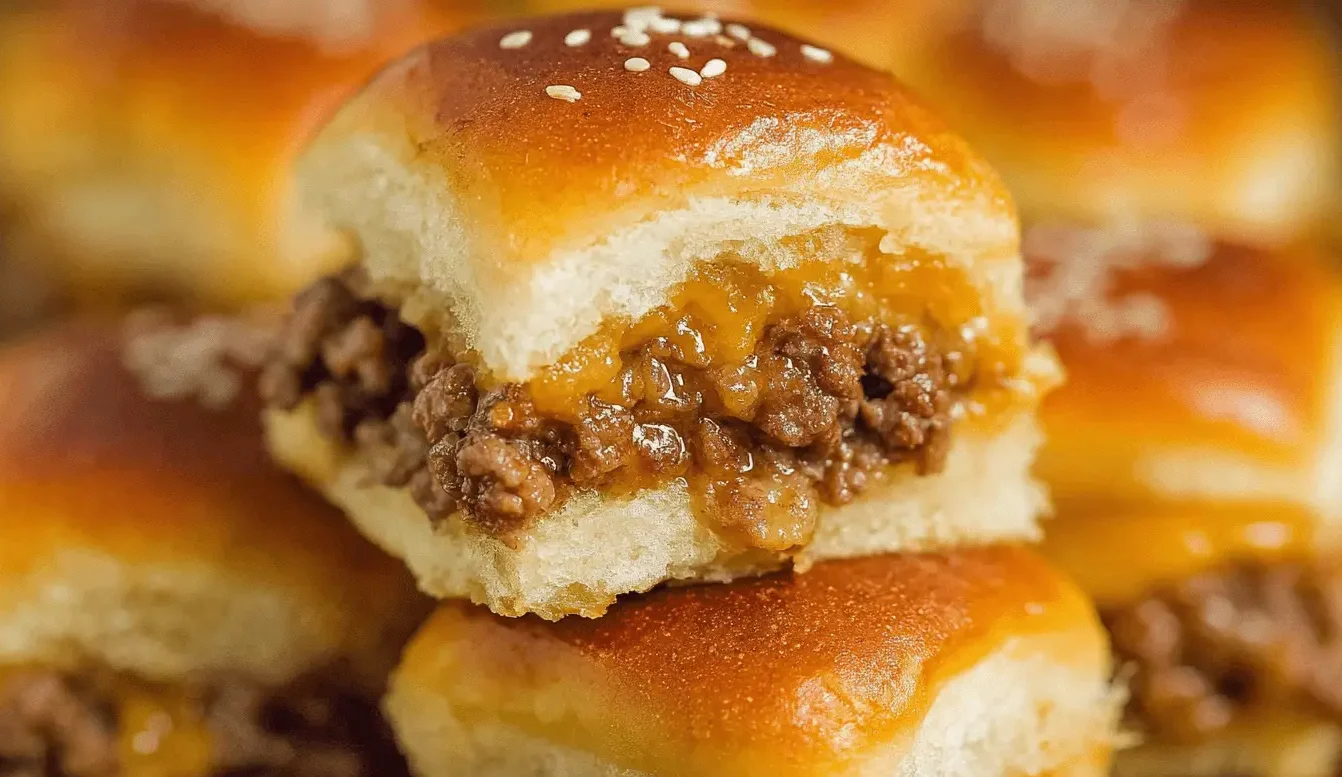
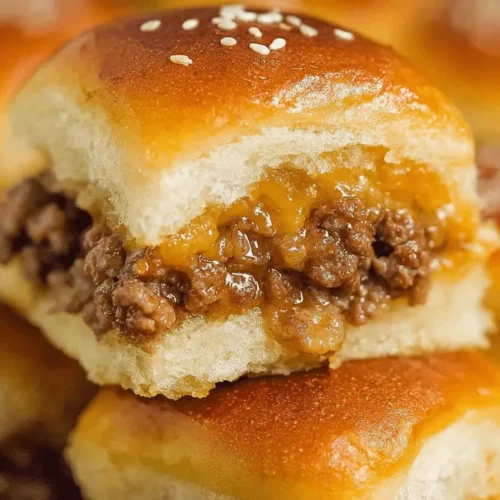
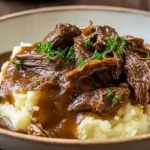
Craving all the flavors of a juicy cheeseburger but in a fun, bite-sized form? These easy cheeseburger sliders bring the magic of a full-size burger into perfectly portioned mini sandwiches that come together in just 30 minutes. Whether you’re hosting game day, feeding hungry kids, or pulling together a last-minute dinner, these sliders deliver big flavor with minimal effort. With melty cheddar, seasoned beef, and soft golden rolls, they’re guaranteed to become a go-to favorite for every occasion.
Table of Contents
Why You’ll Love This Cheeseburger Sliders Recipe
This recipe is a crowd-pleasing classic for so many reasons:
- Fast & Beginner-Friendly: Ready in about 30 minutes with simple steps.
- Perfect for Parties: Ideal for game nights, potlucks, and gatherings.
- Juicy & Cheesy: Layers of tender beef and melted cheddar satisfy any craving.
- No Patties Needed: Ground beef cooks in one skillet—no messy shaping.
- Make-Ahead Friendly: Assemble now, bake later.
- Customizable: Easily adjust toppings, cheese, or spice level.
Ingredients
Gather these simple ingredients to create irresistible cheeseburger sliders that your family and friends will rave about.
- 2 lb lean ground beef, (90/10 or 93/7 fat content)
- 1/2 Tbsp olive oil
- 1 tsp salt
- 1 tsp black pepper
- 1 tsp garlic powder
- 1/2 large yellow onion, finely diced
- 1/4 cup mayonnaise
- 8 slices medium cheddar cheese
- 6 oz medium cheddar, shredded (or used more sliced cheese)
- 24 dinner rolls, (or use 2 packs of 12)
- 2 Tbsp unsalted butter, melted, plus more to grease baking sheet
- 1 Tbsp sesame seeds
Notes & Substitutions
- Beef: Lean beef prevents sogginess. Higher-fat beef works if well drained.
- Rolls: King’s Hawaiian rolls are perfect—soft, slightly sweet, and bake beautifully.
- Cheese: Try Pepper Jack, Swiss, American, or Colby Jack.
- Onion/Garlic: Freshly minced gives stronger flavor.
- Mayonnaise: Optional but helps keep the beef juicy and tender.
According to the USDA, ground beef with a maximum of 30% fat
Equipment
Making these mini burgers requires minimal kitchen tools.
- Large skillet
- Rimmed baking sheet
- Spatula
- Pastry brush (optional, but helpful for buttering buns)
Instructions
Follow these easy steps to assemble and bake your delightful cheeseburger sliders. This simple recipe makes baking easy for beginners!
- Prep Oven & Baking Sheet: Preheat your oven to 350˚F (175˚C). Lightly butter the bottom of a rimmed baking sheet. This prevents sticking and adds flavor.
- Cook Beef & Onion: Place a large skillet over medium-high heat with 1/2 tablespoon of olive oil. Add the finely diced yellow onion and sauté for a few minutes until softened. Then, add the 2 pounds of ground beef. Break up the beef with a spatula and season it with 1 teaspoon of salt, 1 teaspoon of black pepper, and 1 teaspoon of garlic powder. Continue cooking until the beef is just browned, then remove the skillet from the heat.
- Drain Fat & Mix: Tilt the skillet to one side and carefully spoon off any excess fat. Discard the fat. Stir 1/4 cup of mayonnaise into the cooked ground beef mixture until well combined. This makes the cheeseburger sliders extra moist.
- Assemble Sliders – Bottom Layer: Carefully slice the entire pack of dinner rolls in half horizontally, keeping them connected. Place the bottom halves of the dinner rolls onto the buttered baking sheet. Arrange the 8 slices of medium cheddar cheese evenly over the bread.
- Add Beef & Top Cheese: Spread the ground beef mixture evenly over the sliced cheese layer. Use the back of your spatula to square off the edges, ensuring every slider gets plenty of beef. Cover the ground beef with 6 ounces of shredded medium cheddar cheese.
- Assemble Sliders – Top Layer: Place the top halves of the buns, cut-side down, over the shredded cheddar layer. Melt 2 tablespoons of unsalted butter. Use a pastry brush to coat the tops of the buns evenly with the melted butter.
- Bake Sliders: Immediately sprinkle 1 tablespoon of sesame seeds over the buttered tops of the buns. Bake the cheeseburger sliders in the preheated oven for 12-15 minutes, or until the cheese is melted and bubbly and the tops of the buns are golden brown.
- Serve Hot: Remove the baking sheet from the oven. Carefully cut the large slab of sliders into individual portions along the bun seams. Serve these delicious mini burgers immediately.
Pro Tips & Troubleshooting
- Prevent Soggy Buns: Always drain the beef fat thoroughly after cooking. Excess grease can make the bottom buns soggy.
- Even Cooking: Break down the ground beef finely as it cooks. This ensures an even texture in your slider filling.
- Best Cheese Melt: Layering both sliced and shredded cheddar cheese guarantees maximum meltiness and flavor throughout your cheeseburger sliders.
- Sesame Seed Adhesion: Sprinkle the sesame seeds immediately after brushing with butter. The butter acts as an adhesive.
- Baking for Texture: Bake uncovered so the tops of your slider buns can achieve that perfect golden-brown crispness.
- Even Browning: Rotate your baking sheet halfway through the baking time. This promotes uniform browning on all the tops.
- Adding Flavor: For an extra layer of flavor, lightly toast the cut sides of the buns before assembly.
Serving, Storage & Variations
Serving Suggestions
Pair your sliders with:
- French fries
- Onion rings
- Coleslaw
- Potato salad
- Pickles, lettuce, tomatoes, burger sauce
Perfect for:
- Parties
- Quick dinners
- Game day
- Kids’ meals
Make-Ahead & Storage
- Make-Ahead: Assemble sliders, cover tightly, refrigerate up to 24 hours.
- Reheat: Warm in a 300°F oven or microwave.
- Freeze (uncooked): Freeze up to 1 month. Bake from frozen (add extra time).
Variations
- Add crispy bacon, jalapeños, or caramelized onions
- Swap beef for ground turkey or chicken
- Spread BBQ sauce, burger sauce, or dijon mustard under the cheese
Nutrition
Each serving of these flavorful cheeseburger sliders offers a balanced combination of macronutrients, making it a satisfying meal or snack.
| Nutrient | Amount |
|---|---|
| Calories | 266 kcal |
| Fat | 13 g |
| Fiber | 2 g |
| Protein | 16 g |
Please note: Nutritional information is an estimate based on ingredients and preparation.
FAQ
What are the best rolls for cheeseburger sliders?
Soft dinner rolls especially King’s Hawaiian—are perfect because they stay tender and bake evenly.
How do I prevent my sliders from getting soggy?
The key is to thoroughly drain excess fat from the ground beef before mixing and assembling your mini burgers. A light buttering of the baking sheet also creates a small barrier. To ensure safety, the USDA recommends cooking ground beef to an internal temperature of 160°F.
Can I make sliders ahead of time?
Absolutely! Assemble the sliders completely, cover them tightly, and refrigerate for up to 24 hours before baking. This makes entertaining much easier.
Conclusion
These easy cheeseburger sliders deliver everything you love about a classic burger—juicy beef, melted cheddar, soft toasted rolls—in a fun, bite-sized format perfect for any occasion. With quick prep, simple ingredients, and make-ahead options, this recipe is ideal for busy parents, beginners, and anyone craving a no-stress, crowd-pleasing dish. Whether you serve them for parties, weeknight dinners, or game day gatherings, they always disappear fast!
If you give this recipe a try, don’t forget to leave a comment and a star rating below—your feedback helps others find it! And feel free to share your creations on Pinterest or Facebook.
What topping will you try first—bacon, jalapeños, special sauce, or something totally new? Tell us in the comments!
Easy 30-Minute Cheeseburger Sliders
Equipment
- Oven
- rimmed baking sheet
- Large Skillet
- Spatula
- pastry brush
Ingredients
Main Ingredients
- 2 lb lean ground beef (90/10 or 93/7 fat content)
- 1/2 Tbsp olive oil
- 1 tsp salt
- 1 tsp black pepper
- 1 tsp garlic powder
- 1/2 large yellow onion finely diced
- 1/4 cup mayonnaise
- 8 slices medium cheddar cheese
- 6 oz medium cheddar shredded (or used more sliced cheese)
- 24 dinner rolls (or use 2 packs of 12)
- 2 Tbsp unsalted butter melted, plus more to grease baking sheet
- 1 Tbsp sesame seeds
Instructions
Preparation
- Preheat oven to 350˚F and butter the bottom of a rimmed baking sheet.
- In a large skillet over medium-high heat, add olive oil and diced onion. Cook until softened, then add ground beef, breaking it up. Season with salt, black pepper, and garlic powder, cooking until just browned.
- Tilt the skillet to drain any excess fat, then stir 1/4 cup mayonnaise into the cooked ground beef mixture.
- Slice the dinner rolls in half horizontally. Arrange the bottom halves on the buttered baking sheet and layer with the sliced cheddar cheese.
- Evenly spread the ground beef mixture over the cheese layer, using a spatula to square off the edges. Top with the shredded cheddar cheese.
- Place the top halves of the buns over the cheeseburger mixture. Brush the tops with 2 Tbsp melted butter and immediately sprinkle with sesame seeds.
- Bake for 12-15 minutes, or until the cheese is melted and the tops of the rolls are golden brown.


