

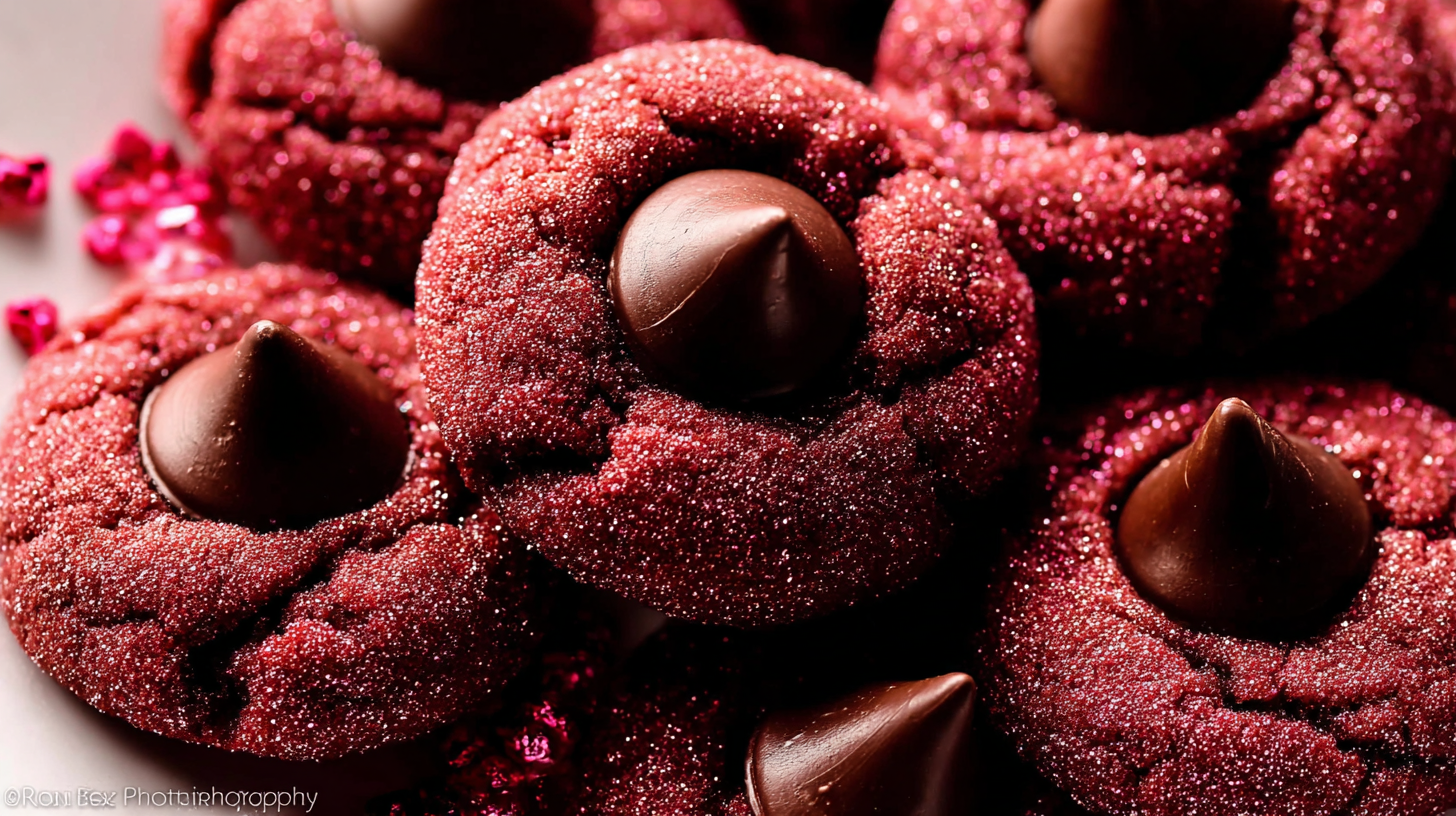
Red Velvet Kiss Cookies are a playful, crowd-pleasing bake that fits busy homes and craving schedules. They pair a striking red shade with a soft, chewy texture that feels special without fuss. The look echoes a classic peanut butter blossoms twist, but the cocoa-infused dough and chocolate kiss center bring a chocolatey, creamy bite. Perfect for holidays, birthdays, or any moment you want a little celebration in cookie form.
Table of Contents
Why You’ll Love These Red Velvet Kiss Cookies
- Irresistible Texture: Soft-baked, chewy centers that melt in your mouth.
- Classic Red Velvet Flavor: Mild cocoa, vanilla, and buttery notes shine through.
- Simple & Straightforward: A straightforward cookie dough comes together quickly.
- Visually Stunning: Bright red dough coated in sugar with a glossy chocolate kiss.
- Make-Ahead Friendly: Dough chills and even freezes well for busy days.
Ingredients
Dry Ingredients
- All-purpose flour (spooned & leveled)
- Natural unsweetened cocoa powder
- Baking soda
- Salt
Wet Ingredients
- Unsalted butter, room temperature
- Packed light or dark brown sugar
- Granulated sugar
- Large egg, room temperature
- Pure vanilla extract
- Milk (buttermilk preferred)
- Gel red food coloring (or alternative)
Coating
- Granulated sugar or confectioners’ sugar
Filling
- Hershey’s Kisses, unwrapped
Notes & Substitutions
- Flour quantity: Keeps cookies from spreading; too little or too much changes shape.
- Cocoa powder: Use natural unsweetened only for the authentic red velvet flavor.
- Red Food Coloring: Gel is best for vibrant color; liquid or beet powder can work with adjustments.
- Milk: Buttermilk adds tang; regular milk is fine if you don’t have buttermilk.
- Sugar coating: Sugar adds sparkle and texture; confectioners’ sugar gives a softer finish.
- Hershey’s Kisses: Other small chocolates or flavors work for different vibes.
Instructions
- Combine dry ingredients: Whisk flour, cocoa, baking soda, and salt. Set aside.
- Cream wet ingredients: Beat butter, brown sugar, and granulated sugar on medium until creamy, about 3 minutes.
- Add egg & vanilla: Mix until combined, then scrape the bowl for even texture.
- Combine wet & dry: Add the dry mix, milk, and food coloring; mix on low until just incorporated. The dough will be sticky. If you want a more vibrant hue, beat in more coloring a little at a time.
- Chill the dough: Cover and refrigerate for at least 2 hours (up to 3 days). If chilling longer, let dough sit at room temperature for 15 minutes before rolling.
- Preheat oven: 350°F (177°C). Line baking sheets with parchment or silicone mats. Keep freezer space ready to snap the chocolate in place.
- Roll cookies: Scoop about 1 tablespoon of dough and roll into balls.
- Coat in sugar: Roll each ball in sugar and arrange on sheets about 3 inches apart.
- Bake: 11–13 minutes, edges set, centers still soft. I usually bake for 12 minutes.
- Cool slightly: Transfer cookies to the sheets to rest 5–10 minutes.
- Press in Kisses: Gently press one Hershey’s Kiss into the center of each cookie.
- Set chocolate: Move cookies to a plate and chill in the freezer for 10 minutes to set the kiss.
- Serve and enjoy: Remove from freezer and indulge.
- Storage note: Cookies stay fresh covered at room temperature for up to 1 week.
Pro Tips & Troubleshooting
- Chilling matters: It prevents over-spread and yields a tender, bakery-like texture.
- Vibrant color: Gel food coloring delivers the best depth; little by little is plenty.
- Stop the chocolate melt: The freezer-setting step quickly sets the Kiss without melting the cookie.
- Measure accurately: Spoon and level flour for consistent results.
- Avoid overmixing: Mix just until combined to keep the cookies tender.
- Doneness cue: Edges should be set while centers stay soft.
Serving, Storage, & Variations
- Serving: Great on holiday dessert tables and cookie platters.
- Storage: Cover and store at room temperature up to 1 week.
- Freezing baked cookies: Freeze up to 3 months; thaw overnight before serving.
- Freezing dough: Freeze dough balls (without coating sugar) up to 3 months.
- Flavor variations:
- Different Hershey’s Kiss flavors for different moods.
- Rolos or other small chocolates.
- Mini peanut butter cups for extra richness.
- Skip Kisses and dip in melted white chocolate after baking.
Nutrition
Nutritional details are estimates and depend on exact brands. Use an online calculator for precise numbers.
| Item (per cookie, approximate) | Calories | Fat | Carbs | Protein |
|---|---|---|---|---|
| Red Velvet Kiss Cookie with Kiss | 95–110 | 4–6 g | 14–16 g | 1–2 g |
FAQ
Why is chilling the dough important?
Chilling prevents excessive spreading and improves flavor development.
Can I skip the red food coloring?
Yes. The color is purely aesthetic; flavor stays the same.
What if my Hershey’s Kisses melt during baking?
Use the freezer trick to set the centers quickly without losing the cookie shape.
Conclusion
Red Velvet Kiss Cookies fuse festive color with a cozy, comforting bite, all in a few simple steps. The dough comes together quickly, the cookies bake up soft and chewy, and a chocolate kiss seals each one with a moment of melt-in-your-mouth magic. Give these a try for your next holiday gathering or weekend bake. Try a batch, share with friends, and celebrate the joy of baking made easy.
The distinct taste of red velvet, which combines mild cocoa with tangy notes from buttermilk and vinegar, distinguishes it from a simple chocolate cookie. Learn more about the unique flavor profile of red velvet.
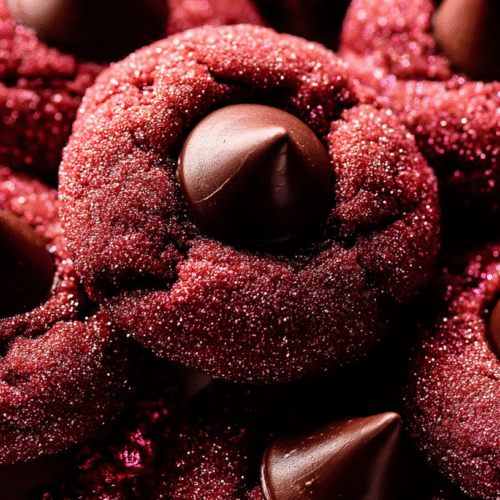
Red Velvet Kiss Cookies: A Festive & Flavorful Treat
Equipment
- Medium bowl
- Hand mixer or stand mixer
- Paddle Attachment
- Large baking sheets
- Parchment paper or silicone baking mats
- Thin spatula
- Large plate or smaller plates
Ingredients
Dry Ingredients
- 1 and 3/4 cups all-purpose flour (219g) spooned & leveled
- 1/4 cup natural unsweetened cocoa powder (21g)
- 1 teaspoon baking soda
- 1/4 teaspoon salt
Wet Ingredients
- 1/2 cup unsalted butter (8 Tbsp; 113g) softened to room temperature
- 3/4 cup packed light or dark brown sugar (150g)
- 1/4 cup granulated sugar (50g)
- 1 large egg at room temperature
- 2 teaspoons pure vanilla extract
- 1 Tablespoon milk (I use buttermilk)
- 1/2 teaspoon gel red food coloring (or alternative)*
Other
- 32–36 Hershey’s Kisses unwrapped
- 1/2 cup granulated sugar or confectioners’ sugar (100g) or confectioners’ sugar (60g) for rolling
Instructions
Preparation
- Whisk together flour, cocoa powder, baking soda, and salt in a medium bowl and set aside.
- In a stand mixer or with a hand mixer, beat the butter, brown sugar, and granulated sugar until creamy, which takes about 3 minutes.
- Gradually add the dry ingredients to the wet mixture, then incorporate the milk and food coloring on low speed until well combined; the dough will be sticky. If desired, add more food coloring for a brighter hue.
- Cover the dough and chill it in the refrigerator for at least 2 hours or up to 3 days. If chilled for an extended period, let it sit at room temperature for 15 minutes before rolling.
Baking
- Preheat oven to 350°F (177°C) and line large baking sheets with parchment paper or silicone mats, ensuring freezer space is available for later.
- Scoop about 1 tablespoon of dough, roll each portion into a ball, and then coat it in the remaining 1/2 cup of sugar, arranging them 3 inches apart on the prepared baking sheets.
- Bake for 11-13 minutes until the edges are set but the centers remain soft; typically, 12 minutes is sufficient. Remove from the oven and cool on the baking sheets for 5-10 minutes.
Finishing Touches
- Press a Hershey’s Kiss into the center of each warm cookie, then use a thin spatula to carefully transfer them to a plate.
- Place the plate of cookies in the freezer for 10 minutes to quickly set the chocolate, then remove and serve.


