

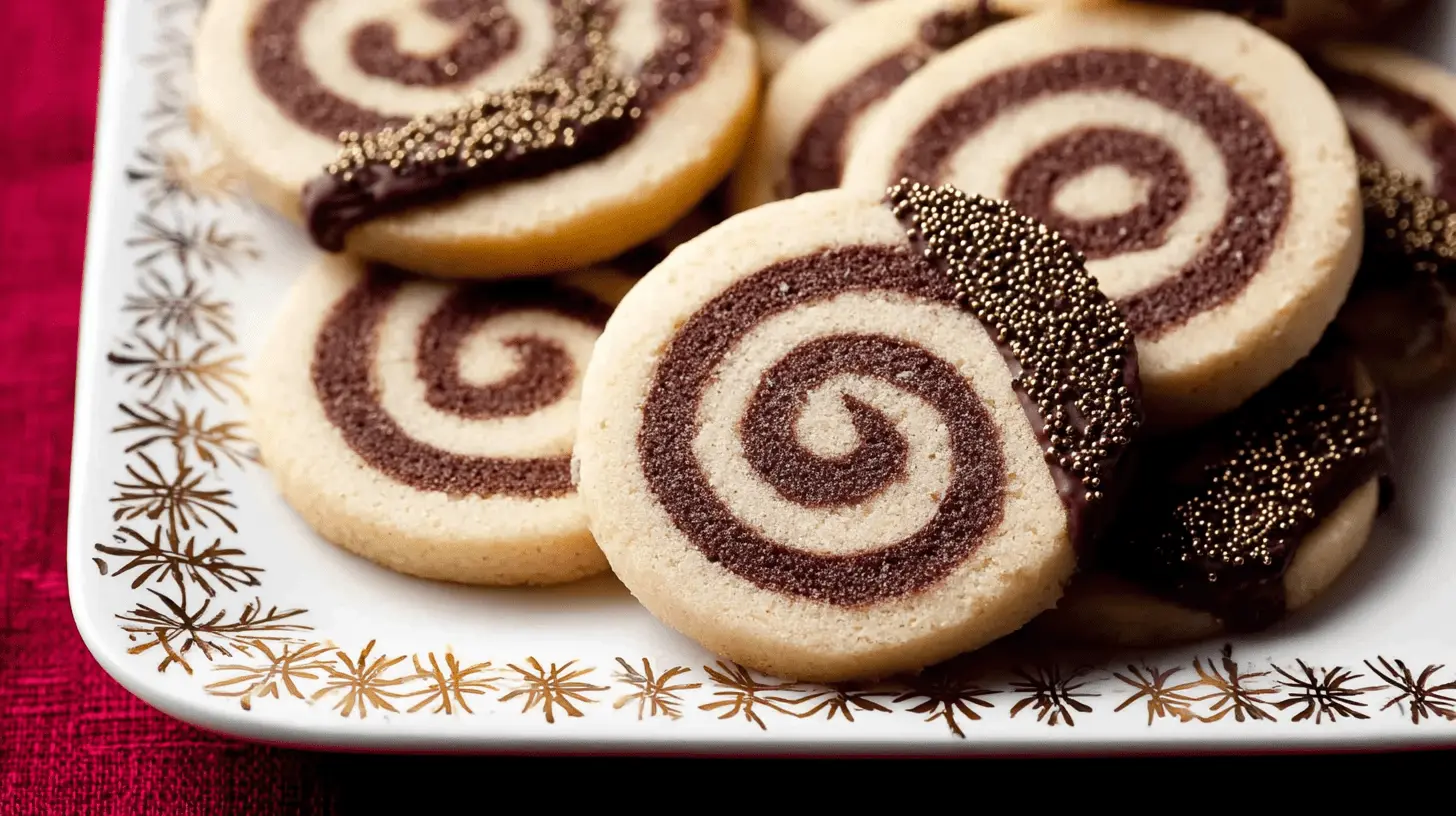
Get ready to bake a batch of stunning pinwheel cookies! This classic treat features a beautiful chocolate and vanilla swirl, making each bite as delightful to look at as it is to eat. Our simple and delicious homemade recipe guarantees a soft, buttery texture that melts in your mouth. Perfect for sharing, these cookies are surprisingly easy to create right in your own kitchen.
Table of Contents
Why You’ll Love These Pinwheel Cookies
These pinwheel cookies are truly special, and you’ll find so many reasons to adore them:
- One Dough, Two Flavors: You only need one base cookie dough, then divide and flavor it for a chocolate-vanilla swirl.
- Perfect Texture: Enjoy soft, chewy centers with slightly crisp edges, a signature of great pinwheel cookies.
- Holiday Ready: They are ideal for holiday baking, cookie exchanges, or heartfelt homemade gifts.
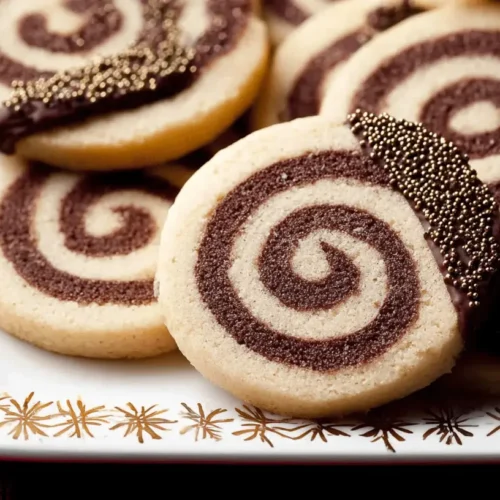
- Visually Stunning: Achieve a gorgeous, intricate spiral that looks impressive but is surprisingly easy to make.
- Easily Customizable: This versatile recipe allows you to swap or add flavors to suit any occasion.
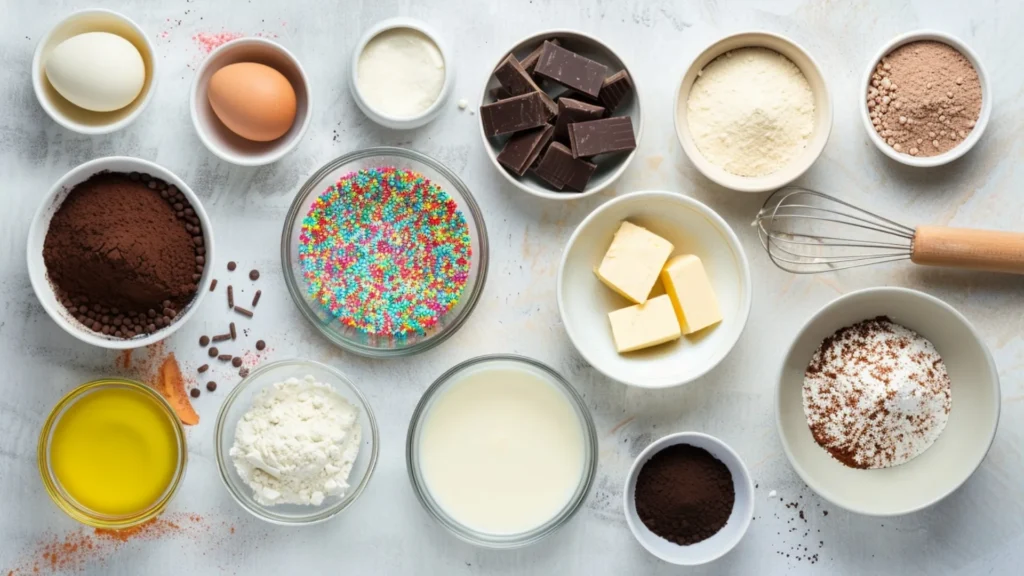
Ingredients for Pinwheel Cookies
To create these delightful pinwheel cookies, gather these essential ingredients. Fresh, quality ingredients make all the difference in flavor and texture.
- 2 and 2/3 cups (333g) all-purpose flour (spooned & leveled)
- 3/4 teaspoon baking powder
- 1/2 teaspoon salt
- 1 cup (16 Tbsp; 226g) unsalted butter, softened to room temperature
- 1 cup (200g) granulated sugar
- 1 large egg + 1 egg yolk, at room temperature
- 1 and 1/2 teaspoons pure vanilla extract
- 2 Tablespoons (10g) unsweetened natural or dutch-process cocoa powder
- 1 Tablespoon (15ml) milk
- Optional: 1/2 teaspoon espresso powder (enhances chocolate flavor)
- Optional: 6 ounces (170g) white, semi-sweet, or dark chocolate, finely chopped, for dipping
- Optional: Sprinkles, for decoration
Notes & Substitutions
Achieving the best pinwheel cookie recipe starts with understanding your ingredients. As detailed by culinary experts, accurate flour measurement is crucial for baking success and can significantly impact the final texture of your cookies. Proper room temperature butter is crucial; it creams smoothly with sugar, creating an airy base. The extra egg yolk adds richness and contributes significantly to the cookie’s soft, chewy texture. We recommend a good quality cocoa powder for the chocolate dough to ensure deep, satisfying flavor. For dipping, choose your favorite type of chocolate – white, milk, or dark all work wonderfully.
Equipment
Gathering your tools before you start makes the baking process smoother. You’ll need:
- Large mixing bowls
- Hand mixer or stand mixer with paddle attachment
- Rolling pin
- Parchment paper or silicone baking mats
- Baking sheets
- Sharp knife or pizza cutter
- Wire cooling rack
- Double boiler (optional, for melting chocolate)
How to Make Pinwheel Cookies (Step-by-Step)
Creating beautiful pinwheel cookies is a fun and rewarding process. Follow these steps carefully for the best results.
- Make the Dough: Whisk the flour, baking powder, and salt together in a medium bowl. Set this dry mixture aside. In a large bowl, use a hand mixer or a stand mixer with a paddle attachment. Beat the softened butter and granulated sugar on medium-high speed for about 3 minutes until light and fluffy. Scrape down the sides of the bowl as needed. Add the egg, egg yolk, and vanilla extract. Beat on high speed for about 1 minute until well combined, scraping the bowl again.
- Combine and Divide: Add the flour mixture to the wet ingredients. Mix on low speed until just combined. The dough will be thick and sticky. Remove the dough from the mixing bowl. You should have between 800–900g of dough. Divide the dough roughly in half. If one half is slightly smaller, use it for the chocolate dough.
- Create Chocolate Dough: Place one half of the dough back into the mixing bowl. Add the cocoa powder, milk, and optional espresso powder. Beat on low speed until the chocolate dough is fully combined and uniformly colored.
- Shape & Initial Chill: Both doughs will be sticky. Lightly flour a work surface (using cocoa powder for the chocolate dough is a good tip!). With lightly floured hands, carefully shape each dough into a 1-inch-thick rectangle block, approximately 4×5 inches. Wrap both blocks tightly in plastic wrap, parchment paper, or aluminum foil. Refrigerate for 60–90 minutes. This chill time is crucial; the dough should be less sticky but still pliable. Chilling longer will make rolling difficult. If over-chilled, let it sit at room temperature for 15–30 minutes to soften slightly.
- Roll Out Doughs: Remove the vanilla dough from the refrigerator, keeping the chocolate dough chilled. Lightly flour a piece of parchment paper. Roll out the vanilla dough to an 8×14-inch rectangle, ensuring straight, smooth sides. The thickness should be between 1/8–1/4 inch. Carefully transfer the vanilla dough on its parchment paper to the refrigerator while you roll the chocolate dough. Lightly dust another piece of parchment paper with flour or cocoa powder. Roll the chocolate dough to an 8×14-inch rectangle, or slightly smaller.
- Layer the Dough: Remove the vanilla dough from the refrigerator. Carefully peel the chocolate dough off its parchment and gently align it on top of the vanilla dough. Pat down the chocolate layer to remove any air bubbles. Use a pizza cutter or sharp knife to straighten any uneven edges.
- Roll into a Log: Starting from a long side, tightly roll the two layered doughs together. Work slowly to avoid gaps between the layers, using the parchment paper under the vanilla dough to assist. Meld the doughs with your fingers at the start of the roll. Patch any cracked or bare spots of vanilla dough as you go. Once rolled, cut the long log in half, creating two 7-inch logs.
- Final Chill: Wrap each dough log securely in plastic wrap, parchment paper, or aluminum foil. Refrigerate for at least 2 more hours, or up to 4 days. This extended chill is vital for easy slicing and maintaining the beautiful spiral shape of your pinwheel cookies.
- Preheat and Prep: Preheat your oven to 350°F (177°C). Line two baking sheets with parchment paper or silicone baking mats.
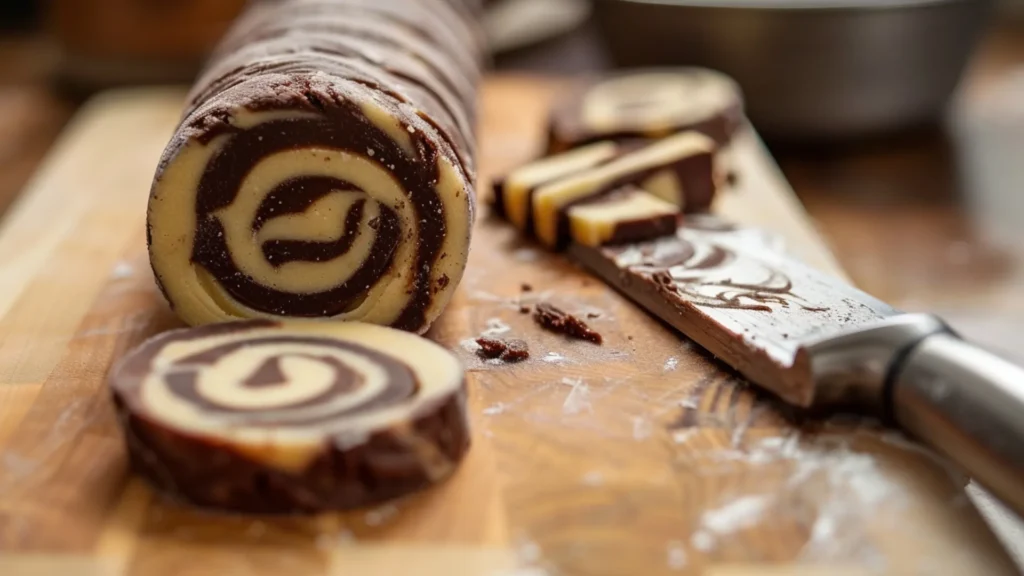
- Slice and Bake: Slice each chilled log into 14 1/2-inch-thick cookies. Arrange the slices about 2 inches apart on the prepared baking sheets, as these pinwheel cookies will spread. If the dough has softened, chill the sliced cookies on the baking sheet for 10 minutes before baking. Bake for 14–15 minutes, or until the edges are very lightly browned.
- Cool and Finish: Remove the cookies from the oven and let them cool on the baking sheets for 5 minutes. Then, transfer them to a wire rack to cool completely. For an optional touch, melt finely chopped white, semi-sweet, or dark chocolate in a double boiler or microwave (stirring every 20 seconds). Dip half of each cooled cookie into the melted chocolate. Add sprinkles if desired. Allow the chocolate to set completely at room temperature or in the refrigerator.
Pro Tips for Perfect Pinwheel Cookies
Achieve consistently beautiful pinwheel cookies with these expert tips:
- Measure Precisely: Use exact measurements, especially for flour, to ensure the correct dough consistency.
- Room Temperature Butter: Your butter must be truly softened, not melted, for proper creaming. Research indicates that creaming room temperature butter and sugar together creates air pockets that contribute to the cookie’s leavening and texture.
- Initial Chill Time: Do not over-chill the dough blocks initially; they need to remain pliable for rolling.
- Lightly Flour Surfaces: Dust your work surface and rolling pin lightly to prevent sticking without toughening the dough.
- Keep Dough Chilled: Always keep unused dough refrigerated to maintain its firmness and prevent spreading. The science of baking shows that chilling cookie dough helps fats solidify and flavors concentrate, leading to a better texture and less spread during baking.
- Roll Tightly: A tight roll is key to creating a perfect spiral with no gaps in your pinwheel cookie layers.
- Chill Sliced Cookies: Chilling sliced cookies on the baking sheet briefly before baking helps them hold their shape.
Troubleshooting Common Issues
- Dough is sticky during shaping: Dust your hands and work surface with a little more flour or cocoa powder.
- Dough tears when rolling: Roll gently and evenly. If it tears, simply press the torn edges back together.
- Layers don’t align perfectly: Don’t worry! You can trim uneven edges with a sharp knife or pizza cutter before rolling.
- Swirls separate during baking: This usually means the dough wasn’t rolled tightly enough, or it wasn’t chilled sufficiently before baking. Ensure tight rolling and adequate chilling time.
Serving, Storing, and Variations
These versatile pinwheel cookies are delightful for any occasion. Serve them alongside a glass of cold milk, a warm cup of coffee, or your favorite tea.
Variations
- Colorful Swirls: Tint the vanilla dough with a few drops of food coloring for festive pinwheel cookies.
- Flavor Swaps: Instead of cocoa, try mixing in finely ground spices like cinnamon or peppermint extract for different flavor profiles.
- Outer Coating: Roll the dough logs in colorful sprinkles or coarse sugar before chilling and slicing for an extra decorative touch.
- Chocolate Dips: Experiment with white, milk, or dark chocolate for dipping, and add different sprinkles or nuts.
Make Ahead & Storage
- Baked Cookies: Store baked pinwheel cookies in an airtight container at room temperature for up to 1 week. Refrigerate chocolate-dipped cookies after a few days to keep the chocolate firm.
- Freezing Baked Cookies: Freeze cooled, baked cookies in a freezer-safe container for up to 3 months. Thaw at room temperature.
- Freezing Dough Logs: Wrap the unbaked dough logs tightly in plastic wrap and then foil. Freeze for up to 3 months. Thaw partially in the refrigerator overnight before slicing and baking.
Nutrition Information
Here is an approximate nutritional breakdown per cookie, based on the ingredients listed above. Please note these values can vary based on exact ingredient brands and portion sizes.
| Nutrient | Amount Per Cookie |
|---|---|
| Calories | 120-130 kcal |
| Total Fat | 6-7 g |
| Saturated Fat | 4-5 g |
| Cholesterol | 20-25 mg |
| Sodium | 50-60 mg |
| Total Carbs | 16-18 g |
| Dietary Fiber | 0-1 g |
| Total Sugars | 9-10 g |
| Protein | 1-2 g |
Frequently Asked Questions
Why do my pinwheel cookies spread too much?
Your dough might not have been chilled sufficiently before baking, or the butter was too soft. Ensure thorough chilling of the logs and sliced cookies.
Can I use melted chocolate in the dough?
No, use unsweetened cocoa powder. Melted chocolate would change the dough’s consistency too much.
How long does the dough need to chill?
The dough needs an initial chill of 60-90 minutes, then a second chill of at least 2 hours (and up to 4 days) for the best results.
Can I make these cookies gluten-free?
You can try a 1:1 gluten-free all-purpose flour blend. Results may vary slightly in texture.
What types of sprinkles work best?
Any sprinkles work! Nonpareils, jimmies, or sanding sugar all add a lovely decorative touch to these pinwheel cookies.
Conclusion
Baking these classic chocolate and vanilla pinwheel cookies is such a rewarding experience! From their striking swirled appearance to their wonderfully soft and buttery taste, they truly are a crowd-pleaser. This recipe makes homemade baking approachable and fun, perfect for both beginners and seasoned bakers. Give this delightful recipe a try and share the joy of these beautiful cookies with your loved ones. We’d love to hear your thoughts and see your creations in the comments below!
Classic Chocolate and Vanilla Pinwheel Cookies
Equipment
- Medium bowl
- Large bowl
- Hand mixer or stand mixer with paddle attachment
- Plastic wrap
- Parchment paper
- Aluminum foil
- Rolling Pin
- Silicone baking mat
- Pizza cutter or sharp knife
- Baking sheets (2)
- wire rack
- Double boiler (optional)
- Microwave (optional)
Ingredients
Dry Ingredients
- 2 and 2/3 cups all-purpose flour (333g), spooned & leveled
- 3/4 teaspoon baking powder
- 1/2 teaspoon salt
Wet Ingredients
- 1 cup unsalted butter (16 Tbsp; 226g), softened to room temperature
- 1 cup granulated sugar (200g)
- 1 large egg plus 1 egg yolk, at room temperature
- 1 and 1/2 teaspoons pure vanilla extract
Chocolate Dough Add-ins
- 2 Tablespoons unsweetened natural or dutch-process cocoa powder (10g)
- 1 Tablespoon milk (15ml)
- 1/2 teaspoon espresso powder optional
Optional Dipping & Topping
- 6 ounces white, semi-sweet, or dark chocolate (170g), finely chopped
- sprinkles optional
Instructions
Make the Dough
- Whisk together the flour, baking powder, and salt in a medium bowl, then set aside.
- In a large bowl, cream the butter and granulated sugar for about 3 minutes until light and fluffy. Add the egg, egg yolk, and vanilla extract, beating on high speed for about 1 minute until well combined, scraping the bowl as needed.
- Gradually add the whisked flour mixture to the wet ingredients, mixing on low speed until just combined to form a thick, sticky dough.
Prepare Chocolate Dough
- Divide the dough, which should weigh between 800-900g, into two halves; use the slightly smaller portion for the chocolate dough if portions are uneven.
- Place one half of the dough back into the mixing bowl and add the cocoa powder, milk, and optional espresso powder. Beat on low speed until the chocolate dough is fully combined.
Shape & Chill Doughs
- On a lightly floured work surface, form each dough into a 1-inch-thick rectangle block, approximately 4×5 inches. Wrap both dough blocks in plastic wrap and refrigerate for 60-90 minutes, until less sticky but still pliable.
Roll Out Doughs
- Remove the vanilla dough from the refrigerator and unwrap it. On a lightly floured piece of parchment paper, roll the vanilla dough into an 8×14-inch rectangle, ensuring straight sides and a thickness of 1/8–1/4 inch, then refrigerate it on the parchment paper.
- Roll the chocolate dough on another floured parchment paper to an 8×14-inch rectangle, or slightly smaller. Carefully peel the chocolate dough from its parchment and place it precisely on top of the vanilla dough, gently patting to remove air bubbles and patching any tears.
Form Log & Final Chill
- Starting from a long side, tightly roll the layered doughs into a log, using the parchment paper to assist and ensuring no gaps; patch any visible vanilla dough as you go. Cut the dough log in half, resulting in two 7-inch logs.
- Wrap each dough log in plastic wrap and refrigerate for another 2 hours, or up to 4 days.
Bake Cookies
- Preheat your oven to 350°F (177°C) and line two baking sheets with parchment paper or silicone baking mats.
- Slice each dough log into fourteen 1/2-inch-thick cookies and arrange them 2 inches apart on the prepared baking sheets; if the dough is soft, chill the sliced cookies for 10 minutes before baking.
- Bake for 14-15 minutes, or until the edges are very lightly browned, then cool on the baking sheet for 5 minutes before transferring to a wire rack to cool completely.
Optional Finishing
- Coarsely chop and melt the chocolate using a double boiler or microwave, stirring until smooth. Dip half of each cooled cookie into the melted chocolate, adding sprinkles if desired.
- Allow the chocolate to set completely at room temperature or in the refrigerator.
Storage
- Store uncovered cookies at room temperature for up to 1 week; refrigerate chocolate-dipped cookies after a few days.


